

Windows Installation#
This chapter describes a streamlined installation method for Allegra on Windows systems using a pre-packaged ZIP file from our resources page. For updating Allegra to a newer version, see Updating Allegra.
Attention
This guide is not intended to make your server secure for public access over the Internet. Additional individual security measures are required for that purpose.
Preparation#
Before you begin the installation, ensure you have the following:
Microsoft-supported Windows system (Windows 11, Windows Server 2019 or later)
Sufficient disk space (at least 20 GB, see hardware requirements)
Java 21 JRE/JDK installed and available in your system PATH (we recommend Adoptium, troubleshooting Java)
A running Allegra-supported database (we recommend PostgreSQL 18 with pgAdmin, see database setup instructions)
Available network port (default 8080, or your chosen port) for the Allegra server
Administrator privileges on the Windows system
Installation#
Follow these steps to install Allegra on Windows using the ZIP package.
Download the ZIP package from the Allegra resources page.
Extract the ZIP file to a folder (e.g.,
C:\allegra). This will be your installation directory, referenced as<INSTALLATION_DIRECTORY>.Run
allegra.bat installfrom within<INSTALLATION_DIRECTORY>to start the setup wizard.Follow the prompts to configure the home directory, database, server, and memory settings (these correspond to entries in
conf/application.properties).(Optional) Install Allegra as a Windows service: Run
allegra.bat install-servicefor automatic startup after reboot (enter same memory settings as during installation).Access Allegra in your browser at
http://localhost:8080(or your configured port) and log in with:Username:
adminPassword:
tissi
Note
The <INSTALLATION_DIRECTORY> contains Allegra’s program files and scripts.
During setup, Allegra also creates a separate <ALLEGRA_HOME> directory
where Allegra stores all attachments and configuration files.
Ensure that Java 21 JRE/JDK and a supported database server are installed before running the installer. Change the default admin password immediately after your first login.
Operation#
Manual Startup and Shutdown#
To start, stop, or check the status of Allegra manually, open a Command Prompt in the installation directory and run:
cd <INSTALLATION_DIRECTORY>
allegra.bat start
allegra.bat stop
allegra.bat status
Managing Allegra as a Windows Service#
If Allegra is installed as a Windows service, you can control it through the Windows Services Manager.
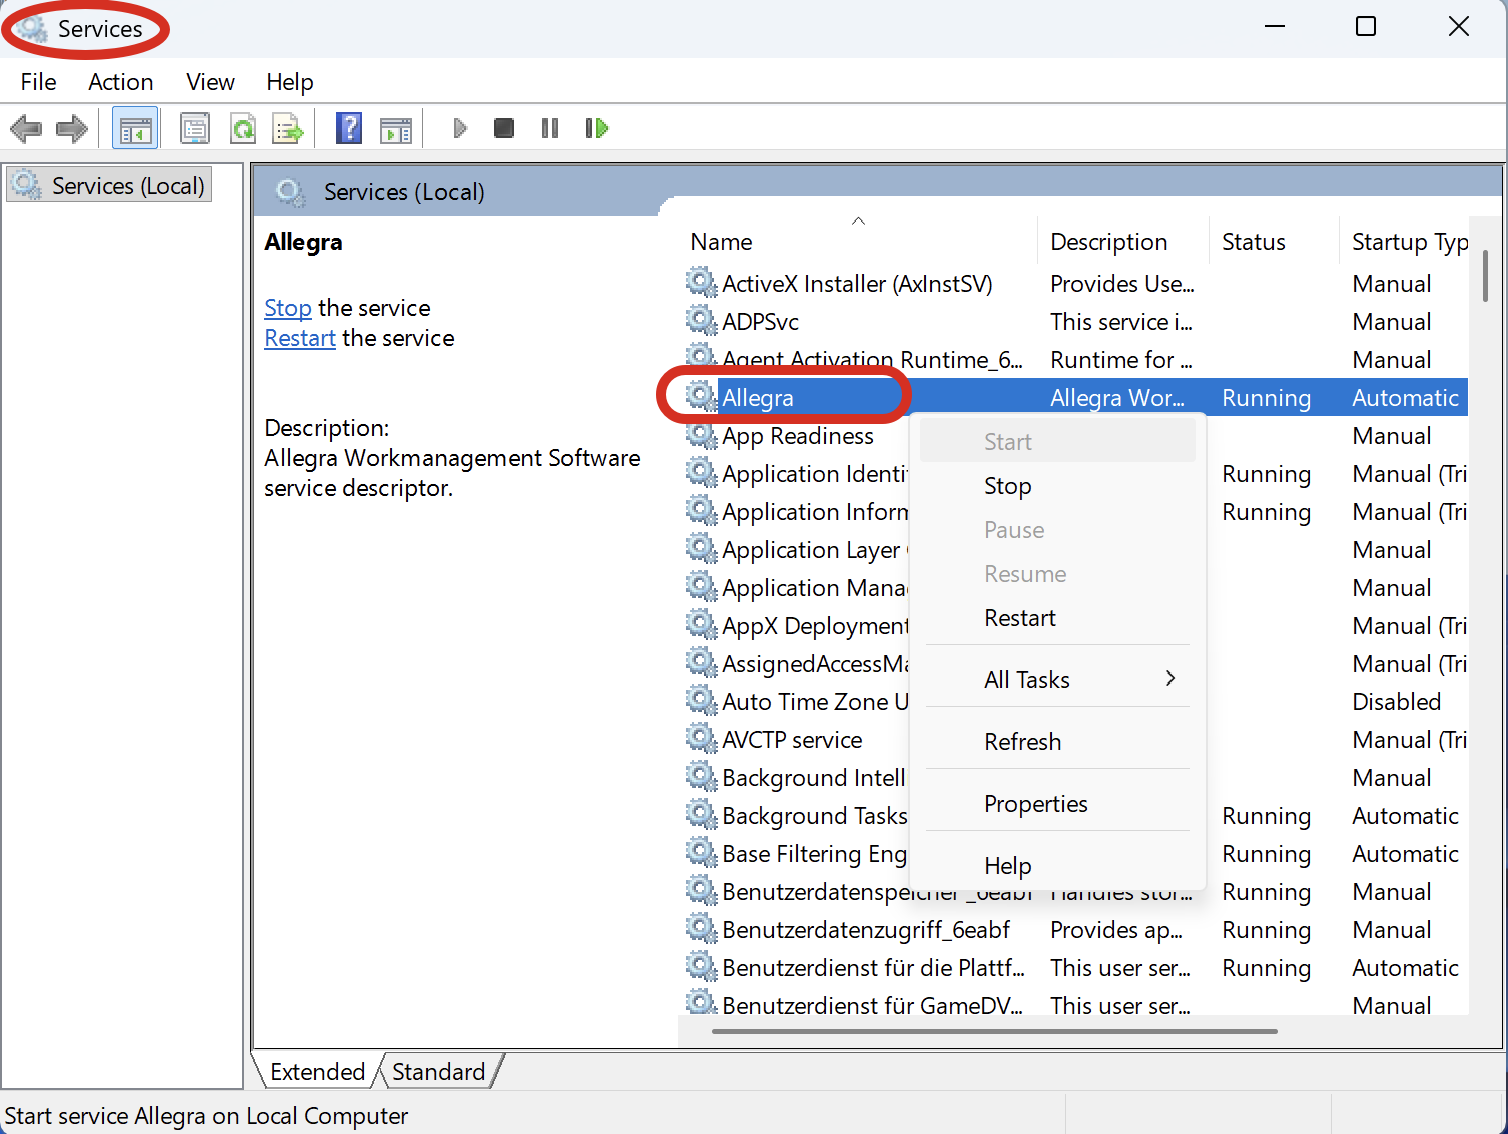
Windows Services Manager showing the Allegra service.#
Automatic Startup#
When installed as a service, Allegra starts automatically each time Windows boots.
To remove the Allegra Windows service, run:
allegra.bat uninstall-service
Updating#
To update Allegra to a newer version, see Updating Allegra.
Next Steps#
After successful installation, you should:
Secure access
Log in and change the default admin password immediately.
Review firewall settings and restrict access to the Allegra port.
For Internet-facing deployments, use a reverse proxy (Apache, Nginx, IIS) and enable HTTPS/SSL.
Configure backups
Configure regular backups for both the database and the
ALLEGRA_HOMEdirectory.
Customize Allegra
Configure projects, users, and workflows.
See the Allegra User Guide.
Maintain your installation
Keep Allegra up to date using
allegra.bat update.Use strong database passwords and limit database network access.
Optional
Set up Gantt chart printing — see Gantt Chart Print Server.
Install Allegra Service Desk — see Allegra Service Desk.
Troubleshooting#
Application Won’t Start#
Check Java installation:
allegra.bat check-java
Check if the default port (8080) is already in use:
netstat -an | findstr :8080Review the startup log:
<INSTALLATION_DIRECTORY>\allegra-startup.log
Check the application log:
Review
<ALLEGRA_HOME>\log\catalina.outfor detailed error messages.Verify database connectivity:
Ensure your database server is running and reachable from the Allegra host.
Setting JAVA_HOME#
If Allegra cannot find your Java installation, you may need to add the Java installation directory to your system PATH, in this windows this can be done via the User Interface:
Assuming you have downloaded a Java 21 JRE/JDK in C:\Program Files\Java\jdk-21:
Add JAVA_HOME in two places under
Windows Environment Variables:In the User variables section, click “New” and add: - Variable name: JAVA_HOME - Variable value:
C:\Program Files\Java\jdk-21In the System variables section, click “New” and add: - Variable name: JAVA_HOME - Variable value:
C:\Program Files\Java\jdk-21
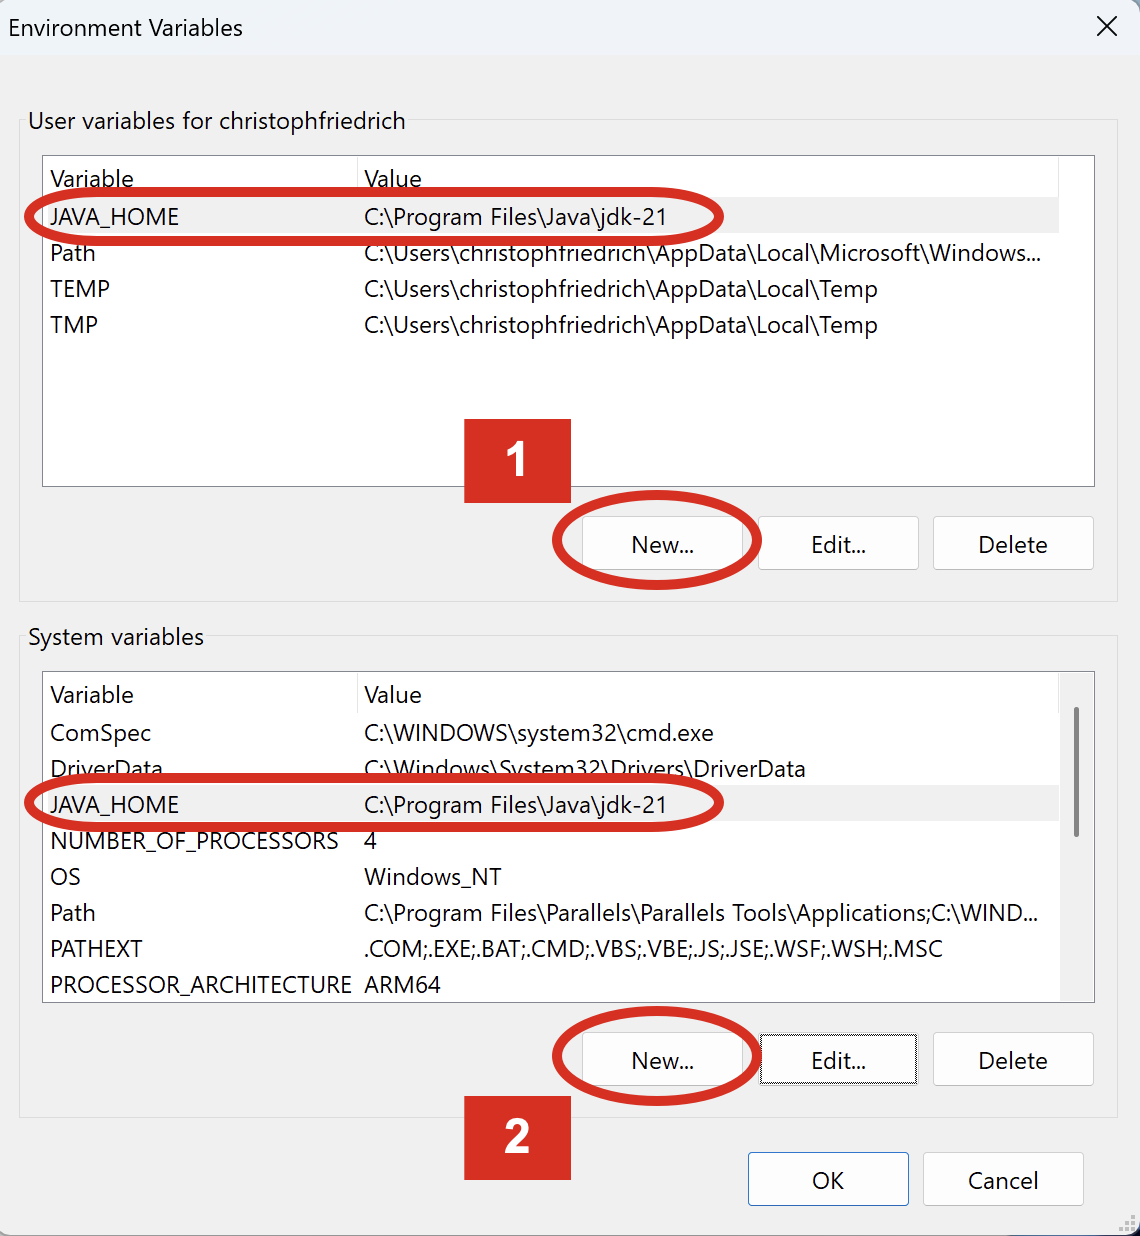
Setting the JAVA_HOME variable in Windows Environment Variables.#
Add JAVA_HOME to two paths in the PATH variable:
In the User variables section, find the “Path” variable, select it and click “Edit”. Click “New” and add:
%JAVA_HOME%\binIn the System variables section, find the “Path” variable, select it and click “Edit”. Click “New” and add:
%JAVA_HOME%\bin
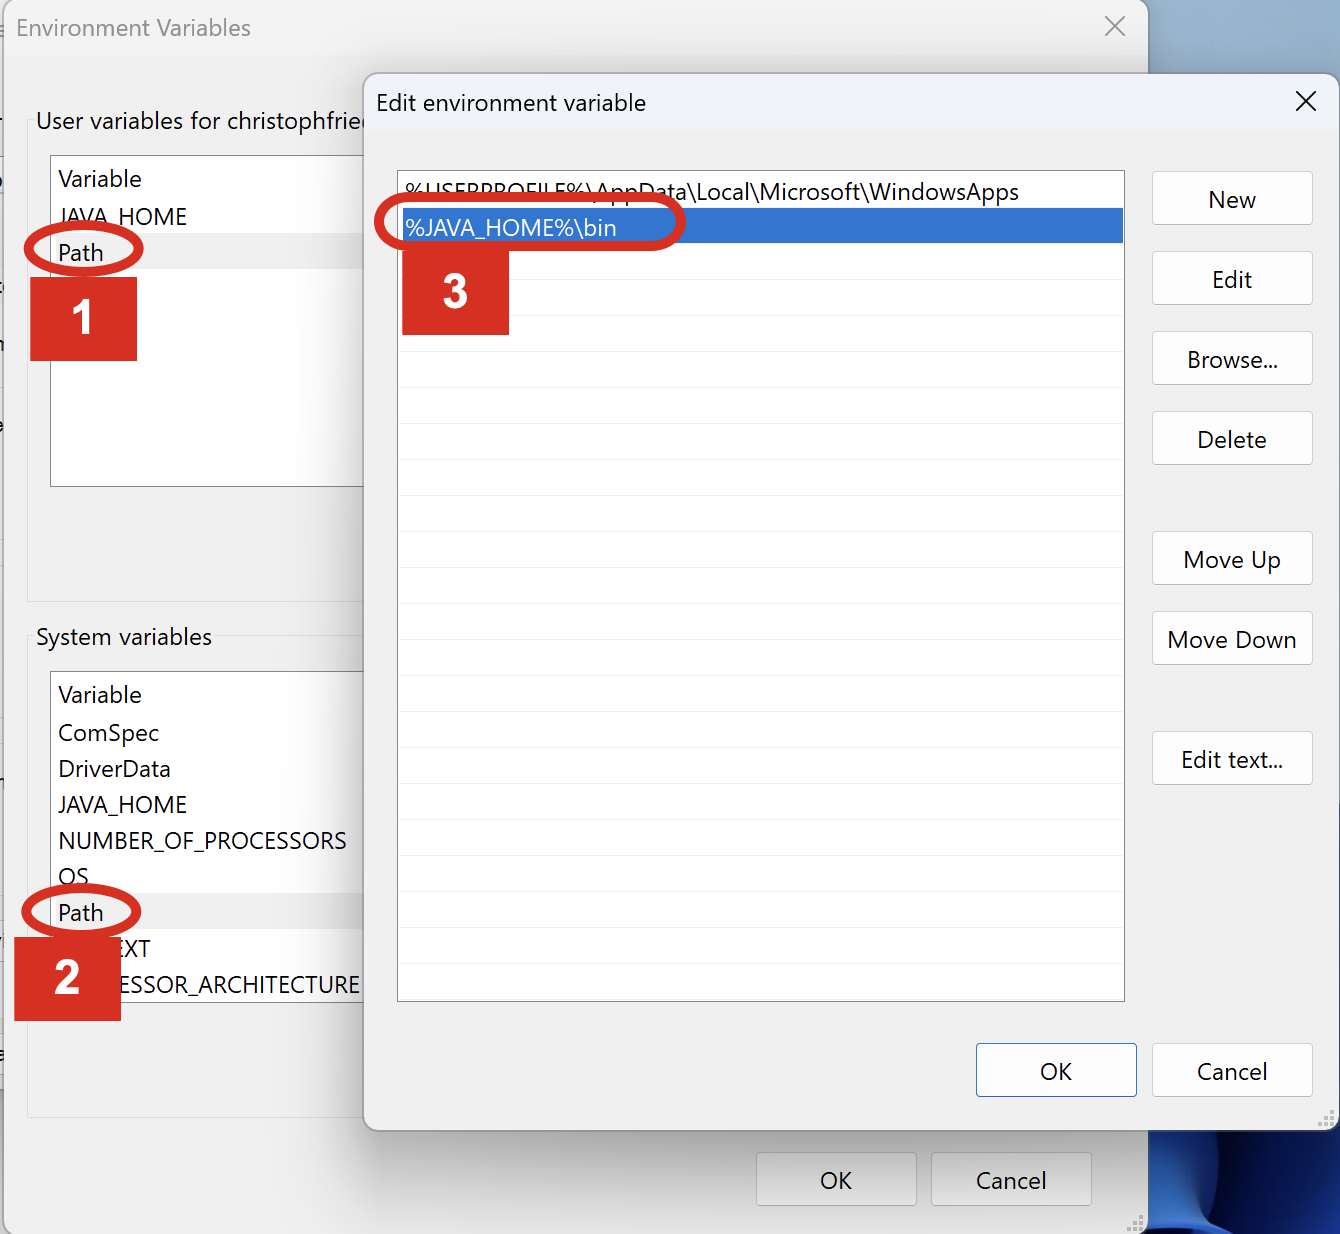
Setting the PATH variable in Windows Environment Variables.#
Click “OK” to save all changes.
Note
You need to restart your Command Prompt or system for changes to take effect. Rickt clicking on your home screen and “Refresh” might also work for the changes to take effect.
Out of Memory Errors#
If you encounter an OutOfMemoryError in the logs:
Stop Allegra:
allegra.bat stop
Increase the memory allocation:
allegra.bat setup-memory
# Enter a higher memory value when prompted
Restart Allegra:
allegra.bat start
Database Connection Errors#
If Allegra cannot connect to the database:
Ensure the database server is running.
Check firewall and network settings.
Verify database credentials and configuration:
allegra.bat show-config
Test the connection using a database client tool.
For MS SQL Server, ensure the SQL Server Browser service is running.
Additional Commands#
Following useful commands are available in the <INSTALLATION_DIRECTORY>:
allegra.bat help                 # Display help information
allegra.bat setup-home           # Configure Allegra home directory
allegra.bat setup-db             # Configure database connection
allegra.bat setup-server         # Configure server settings
allegra.bat setup-memory         # Configure memory settings
allegra.bat show-config           # Display current configuration
allegra.bat check-java           # Verify Java installation
allegra.bat version              # Display current version
allegra.bat update               # Update Allegra to latest version
allegra.bat update-script        # Update allegra.ps1 script to latest version
allegra.bat check-script-updates # Check update script version
allegra.bat install-service      # Install Allegra as a Windows service
allegra.bat uninstall-service    # Remove Allegra from Windows services
Key Properties#
The following important configuration properties are stored in
<INSTALLATION_DIRECTORY>\conf\application.properties:
# Allegra home directory
allegra.home=C:\allegra\allegra-home

# Database configuration
allegra.db.adapter=postgresql
allegra.db.driver=org.postgresql.Driver
allegra.db.url=jdbc:postgresql://localhost:5432/allegra
allegra.db.username=allegra
allegra.db.password=secret

# Server configuration
server.port=8080
server.servlet.context-path=/

# Memory configuration (in MB, e.g., 2048 = 2GB or 4096 = 4GB)
allegra.server.memory=2048