

Onboarding for project managers#
wsman sysman sysadmin
As a project manager, you configure, structure and control your project. To do so, you create a new workspace — for example via the large Add button at the top. The project wizard guides you through the steps.
Each workspace is based on a workspace type. Allegra comes with preconfigured workspace types that you can extend. Once the workspace exists, you assign roles to team members.
Select or configure a workspace type#
The workspace type determines which item types, workspace roles and workflows are available in the project. You specify it when creating a new workspace.
If none of the existing workspace types is sufficient, create a new one as a system administrator. Proceed as follows:
Create a workspace type, e.g. “Construction project” (see Workspace types).
Define the required item types (e.g. “Task”, “Ticket”) and configure them (see Managing item types).
Define the item states needed overall (e.g. “new”, “in progress”, “done”) (see Managing item statuses).
Assign to each item type the states valid for it (see Workspace types).
If you need custom selection lists in your forms, create them now (see Custom lists).
Define which item attributes you need for each item type, and add new ones if required (see Item attributes).
Configure dedicated forms for each item type (see Forms).
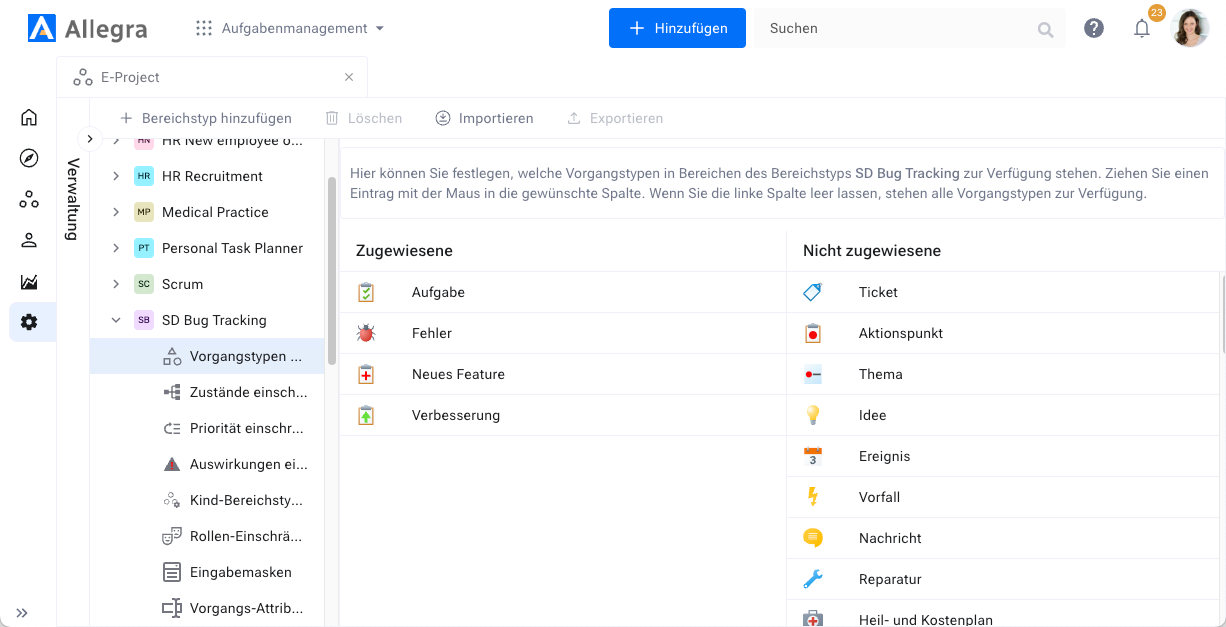
Configuring workspace types#
Create a workspace#
In the second step, you create a workspace (project) and assign it the prepared workspace type. The workspace thereby inherits the complete configuration of its workspace type.
Adding a workspace#
Assign roles to team members#
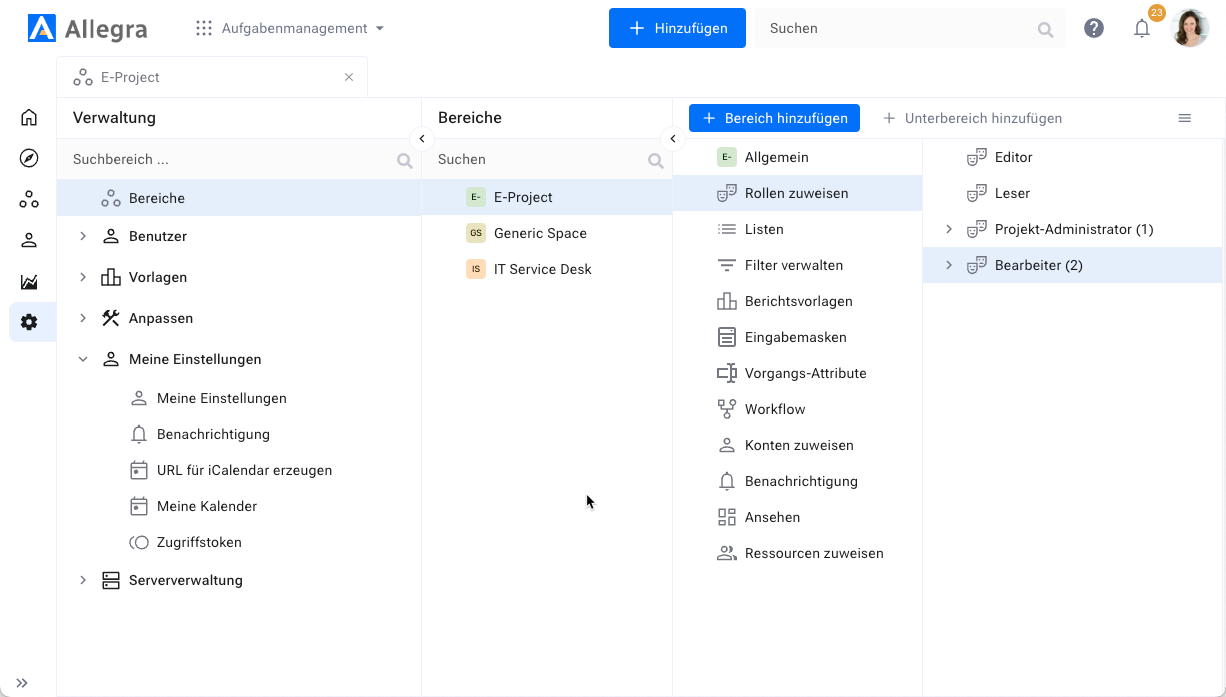
So that someone can create and edit items in the new workspace, you assign them at least one workspace role for this workspace.
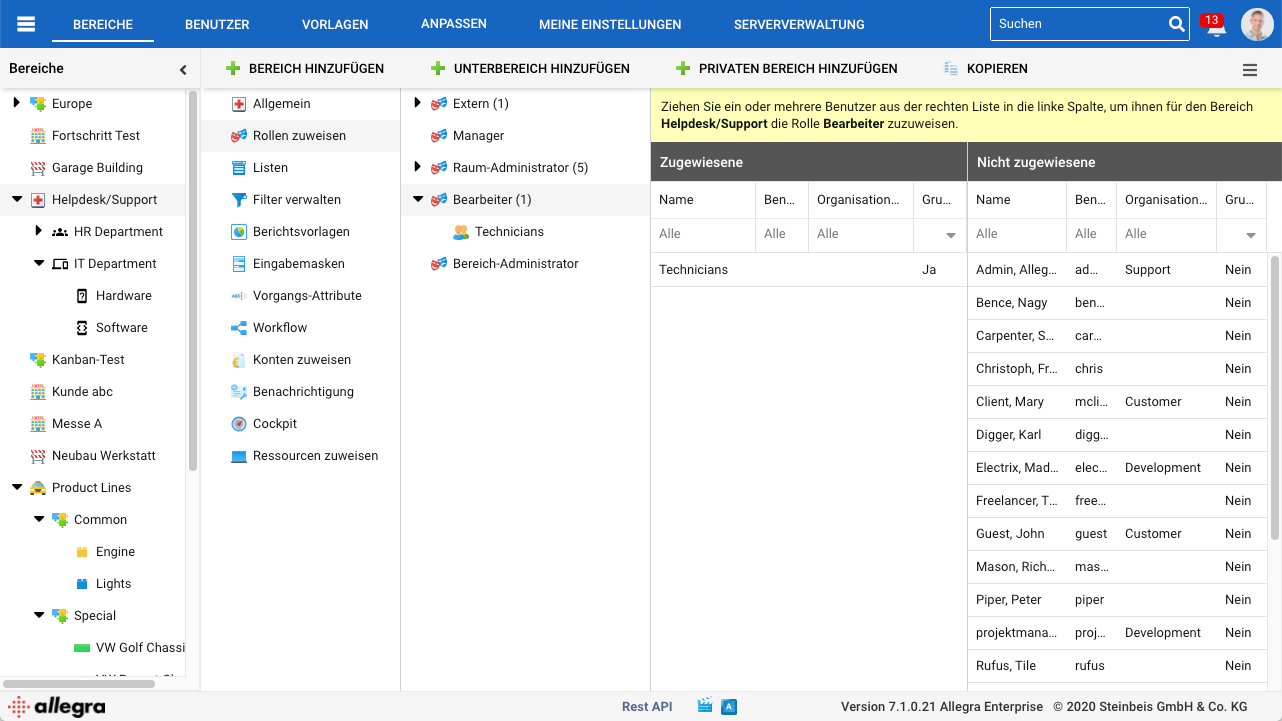
Assigning roles#
Example configurations#
After the initial installation, you will find preconfigured workspace types in Allegra. Choose the one that comes closest to your needs and adapt it. Delete workspaces and workspace types you do not need.