

Notification Conditions#
You can further filter the notifications generated by the triggers by assigning notification conditions. With these filters, you can control down to the individual item attributes, what kind of messages you receive from your Allegra system when items are created or changed.
You must be logged in as a system manager or system administrator.
When items are created or changed, a message for this item is prepared for you, depending on the settings for the notification trigger. With notification conditions, you can examine the item related to this message, and depending on the result of the evaluation, the message is forwarded to you or discarded.
Notification conditions are logical expressions that refer to item attributes. If the condition is true, a notification is sent to you. With notification conditions, you can view all item attributes, not only their new value, but also the value before the change. This way, you can filter both by absolute values and by value transitions.
Each notification condition can be named and stored in a repository. The system administrator can put conditions in the public repository, so that all users can access and use them. A workspace administrator can copy conditions into a workspace repository, so they are available to all users who have a role in one of the workspaces managed by the workspace administrator.
You can copy a public notification condition into your private repository and modify it there according to your wishes. You can change and delete your own conditions, and you can create new conditions.
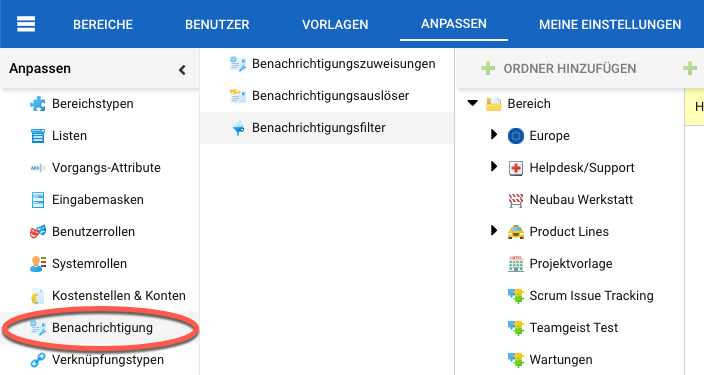
Switch to administration. In the main menu, select Customize > Notification.
Configure notifications#
In the next navigation column, click on “Notification State”.
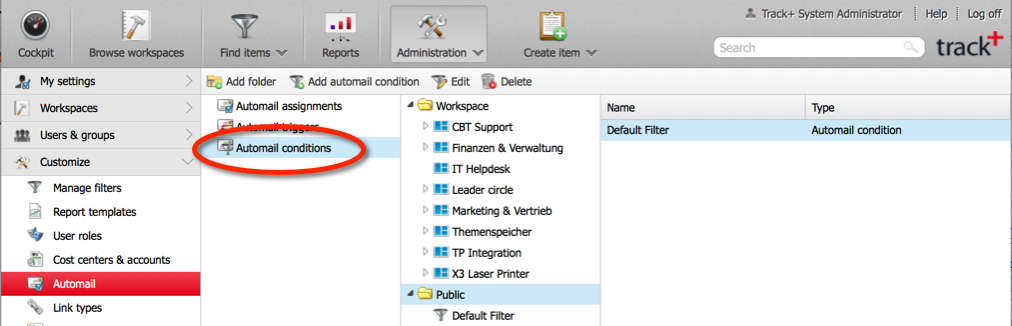
Select the folder in which you want to create or change a condition. For example, click on “Workspaces > IT-Helpdesk” to create or change a condition specifically for this workspace. To add a condition, click the “Add” button in the toolbar. To edit a condition, select it from the list on the right and then use either the context menu or the “Edit” button in the toolbar.
Hint
You can only change conditions that you “own”, i.e. that you have created yourself. Only the system manager or system administrator can edit and delete filters that do not belong to them.
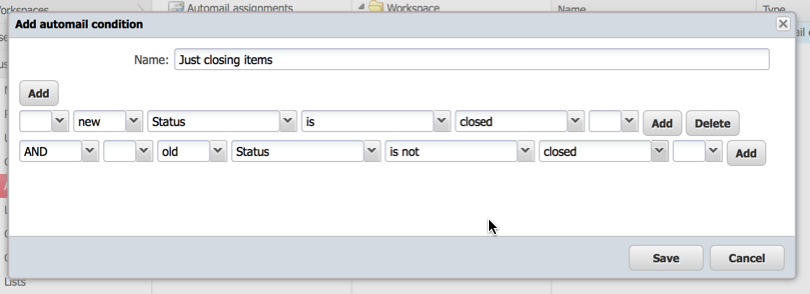
Enter a name for the condition and click the “Add” button. Define your condition.
The selection field with “new” and “old” refers to the value of the item property before and after the triggering change. This way, you can filter by transitions. In the example, we filter on the state transition from any state other than “closed” to “closed”. So if changes are made in the “closed” state, we would not receive a notification.
Important
“Current user” always means “me” from the perspective of the user who is using a notification condition.
Save your condition.
You have created or changed a notification condition. You can now use this in conjunction with a notification trigger to control the messages from the Allegra system to you.