

Adding JasperReport templates#
JasperReport template design overview#
Designing and deploying report templates for Allegra is a five-step process:
Download an existing template similar to the one you want to create from the Allegra server.
Download some sample report data from the Allegra server to your local disk in XML format.
Start JasperSoft Studio and point the data source to the sample data you just downloaded.
Interactively design and test your new template locally, using the sample data as test input. Repeat until you are satisfied with the result.
Package all report template files along with some descriptive files into a single ZIP file and upload it to the Allegra server.
You can skip the first step if you want to start from scratch. Of course, you can skip the last step if you are satisfied with creating only local reports. In this case, your report template cannot be run directly on the server, and will not be available to others.
Step 1: Downloading existing template from server#
It is easier to create a new template from an existing one, rather than start from scratch. Allegra comes with over 20 ready-to-use report templates. Log in and go to the Reports toolbar icon.
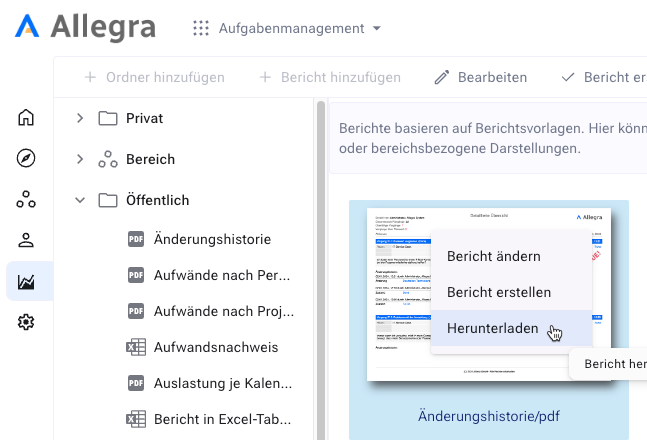
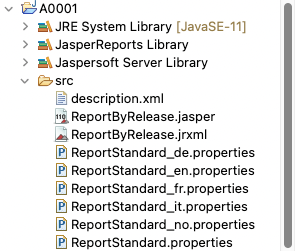
Select a template with a right mouse click and “Download”. The file you have downloaded is a ZIP-file, which you should unpack.
Step 2: Downloading sample data#
It is convenient to test your reports during the design process using sample data. Typically, you will rapidly make changes to your template design, compile the template, and run the report to see what the result looks like.
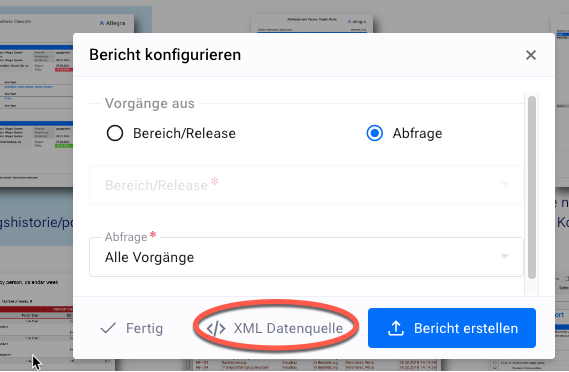
To create a sample data set, run the report using a filter. Click on “Create report”, then choose a filter. Ensure that the data set you get is representative and has a reasonable size.
Step 3: Creating the JasperSoft Studio project#
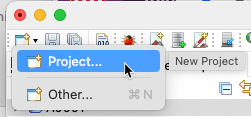
To develop your template, you need to create a JasperSoft Studio project. Open JasperSoft Studio.
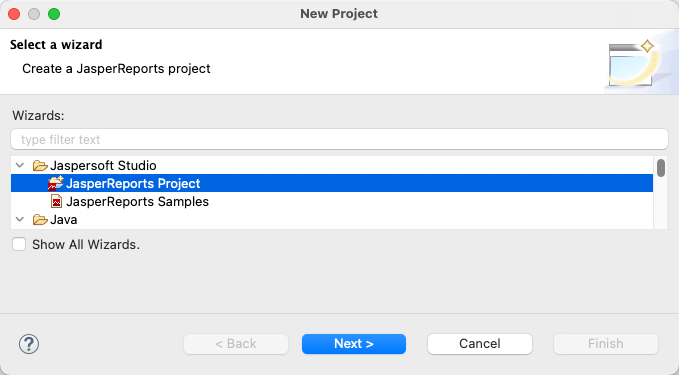
On the next screen, select “JasperSoft Studio Project” and click “Next”. Give a name to the project and save.
You now have a basic project structure.
Add a new source folder named src by using the context menu, New > Folder.
Step 4: Configuring the Data Adapter#
It is convenient to test your reports during the design process using sample data. To test the report templates with real data, you need to provide a data source.
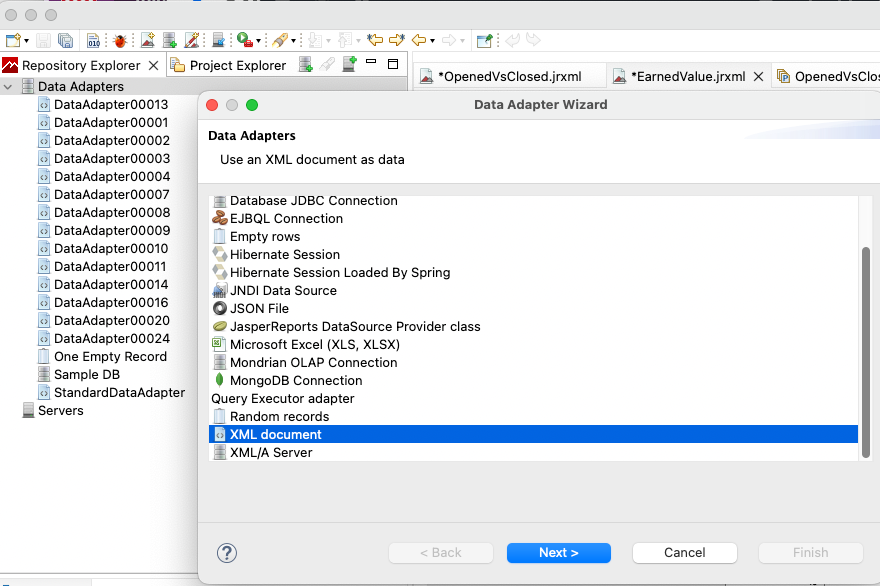
Select the XML data adapter.
A new form appears which allows you to edit the properties of your new XML data adapter. Enter the values as shown below. For the XML file, enter the path for the file that you previously downloaded from your Allegra server.
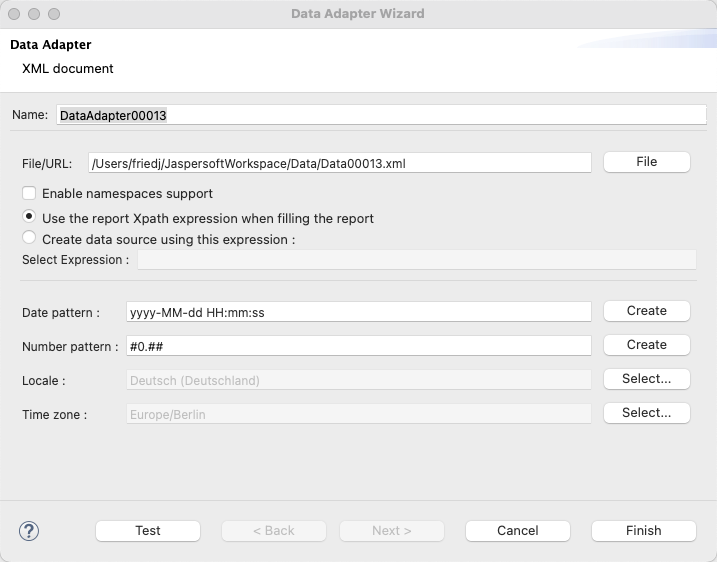
Test your adapter and click on “Finish”.
Step 5: Designing the report template#
It is most efficient to start with an existing template when designing a new one.
To start the design process, double click on the .jrxml file you want to use as a starting point.
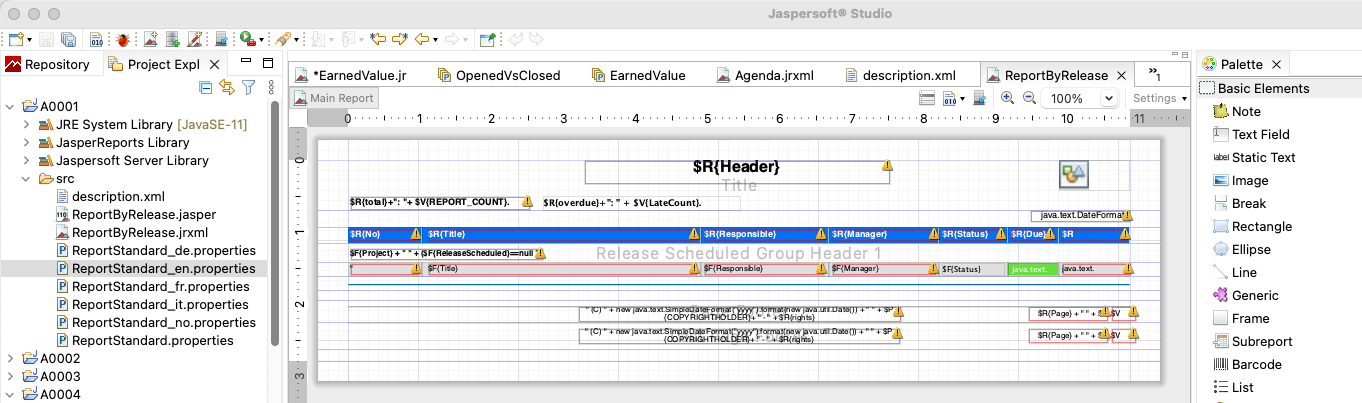
The actual report data is placed into the detail band. When running the report, the detail band is generated for each issue.
Example 1: Changing the Report Logo#
As a first example, let’s try to change the logo that appears at the top right of the first report sheet. You can see that the logo in the template is placed in the “title” band.
Click on the image and go to the “Properties” window on the lower right.
Go to the “Image” section. Here you see the name of the image file that is being included. The way it is shown here, it refers to the file that is placed directly in the template directory. The parameter $P{BASE_URL} is required so that later on the system can find the image file in the correct place.
In our example, the image file is JPEG encoded and has a size of 253 x 121 pixels. However, the image is scaled down to half its size (126 x 60 pixels) in the report template, which you can see on the “Common” tab.
If this was all you wanted to do, proceed to Step 6 to deploy the modified report template on the server.
Example 2: Inserting a custom field#
To map fields in the XML data set coming from the Allegra server to JasperSoft Studio fields, click on the “Fields” node in the lower left navigation area. In the context menu select “Dataset and Query”.
Step 6: Deploying report templates on the server#
Once you are satisfied with your report template design, you can deploy the template on the Allegra Server. This allows you and possibly others to have a nicely designed report created directly from a report overview on the server, without having to download and configure anything locally.
Most importantly, you need to have the compiled report template file in the template directory. The compiled report template files have the ending
jasper. We have set up our project such that they appear in thesrcdirectory.Make sure you have a preview image of your report with some sample data, about 800 x 550 pixels. For convenience, call it
preview.png. This allows the users of the Allegra system to see what the report would look like without actually executing it.Ensure that the correct texts are shown in the
description.xmlfile.
Now place all files in the src
directory into a ZIP file. Ensure that all files are at the topmost level
of the ZIP file and that there is no directory at the top level. You need
to ZIP the files, not the directory.
After you have created a ZIP file with the structure as shown above, log in to the server. Go to Reports and upload your report template.
Advanced Preprocessing with XSLT Style Sheets#
The Allegra XML data file format may not be suited for a particular report idea that you have. For example, the standard data structure does not support printing a pie chart on the number of issues assigned to each responsible, or other similar presentations relying on summarized data.
However, you can create reports like that by preprocessing the original XML data file using an XSLT style sheet and a style sheet processor. Once you have tested your style sheet and report, you include the style sheet into the report zip file, add its name to the report description file, and when you execute the report on the server, it will use the same style sheet before it creates the report!
There is an example in the JasperSoft Studio distribution that uses a style sheet to create a pie chart report. In order to test and execute your style sheet, you need to install a style sheet processor on your development computer. The Allegra server uses the Xalan processor which is freely available, so it may be best to use that as well on your client. We will refer to this processor in the following.
The procedure to create reports based on your own data structures is as follows:
Download some sample report data from the Allegra server to your local disk in XML format.
Develop your style sheet and create a new XML data file from the original XML data file, using the XSLT processor.
Start JasperSoft Studio and point the data source to the sample data you have just created using your style sheet and the style sheet processor.
Interactively design and test your new template locally, using the sample data as test input. Repeat until you are satisfied with the result.
Package all report template files along with some descriptive files and your style sheet into a single ZIP file and upload it to the Allegra server.
This process is basically the same as outlined before for reports without data preprocessing, except for the additional step of creating your own XML data file and pointing your data source towards it. Furthermore, you need to add your style sheet to the report package that you upload to the server.
You can run the Xalan style sheet processor from the command line like this:
java -classpath <yourPathTo xalan.jar>
    org.apache.xalan.xslt.Process -in xmlSource
          -xsl stylesheet -out outputfiles
For example, if you have installed the Xalan jar file (xalan.jar) in C:\Program Files\Xalan, and you use the original exported file from Allegra, you would enter:
java -classpath C:\\Program Files\\Xalan\\xalan.jar
          org.apache.xalan.xslt.Process -in TrackReport.xml
          -xsl chart.xsl -out TrackChart.xml