

Adding an item attribute#
sysman sysadmin
Here is how you add an item attribute to your installation.
Attention
If you want to create an attribute of type “selection list”, create the list beforehand (see Custom lists).
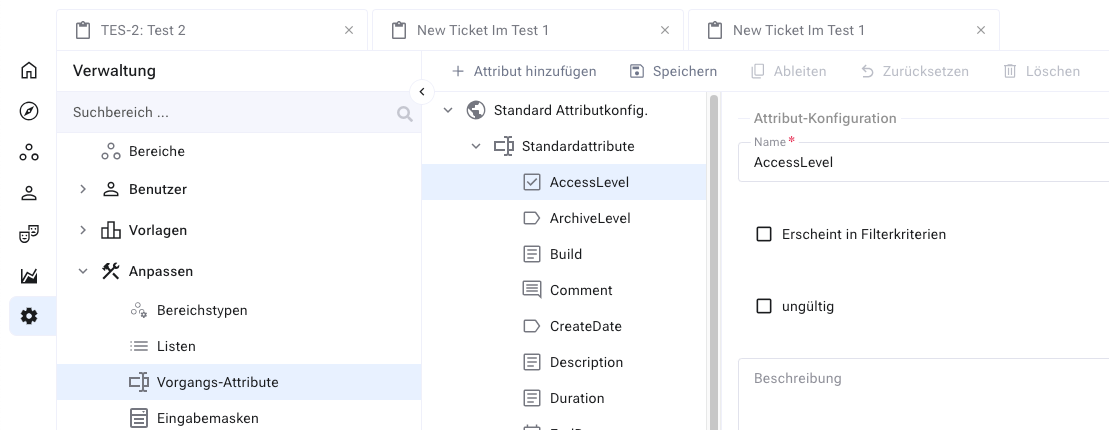
Switch to the Administration. In the main menu, choose
Customize>Item attributes.In the properties navigation pane, click the node under which you want to create the attribute. In the example we add an attribute to the “Requirement” item type.
In the toolbar, click
Add.Fill in the form on the right. Choose the attribute type and enter a name.
Name: You reference the attribute under this name in reports and search queries.
Attribute type: Choose from the list of available types.
Description: Optional field — for administration and documentation purposes only.
Important
You can no longer change the attribute type after creating it.
Enter a label and, optionally, a tooltip. The label appears on the input forms on which you place the attribute.
Hint
If you mark the attribute as mandatory, the user must enter a value when creating an item — provided the attribute appears on the associated form. If it appears on no form, the mandatory check fails silently.
Enable
Explicit historyif you want to record changes to this attribute separately from others. This is only useful if you will analyze the change history specifically for this attribute — otherwise the shared history is sufficient.Fill in the attribute-specific configuration section — default values, minimum and maximum values and so on.
In the toolbar, click
Save.
Your new attribute is now available to all projects that want to use it. Although you defined it at the project level in the example, Allegra automatically promotes it to the system level for reuse.
Note
Before you can use the new attribute, add it to at least one input form.