GitLab CI/CD#
sysman sysadmin
GitLab is a robust Continuous Integration/Continuous Delivery (CI/CD) tool based on Git repositories. It provides a management layer on top of Git, allows repositories to be organized into groups and access rights to be managed, and supports various CI/CD workflows.
The integration between GitLab and Allegra offers the following features:
Mapping Git commits to items
Mapping Git pull requests to items** (in progress)
Displaying Git commits related to items in cockpit tiles
Direct links to the GitLab repository browser
Setting up the GitLab integration#
Prerequisites#
To establish a connection between Allegra and GitLab, the following prerequisites must be met:
You have system administrator access to Allegra.
Your Allegra instance has network access to your GitLab instance.
You have the permissions required to create GitLab access tokens, which are needed to access commit messages in GitLab.
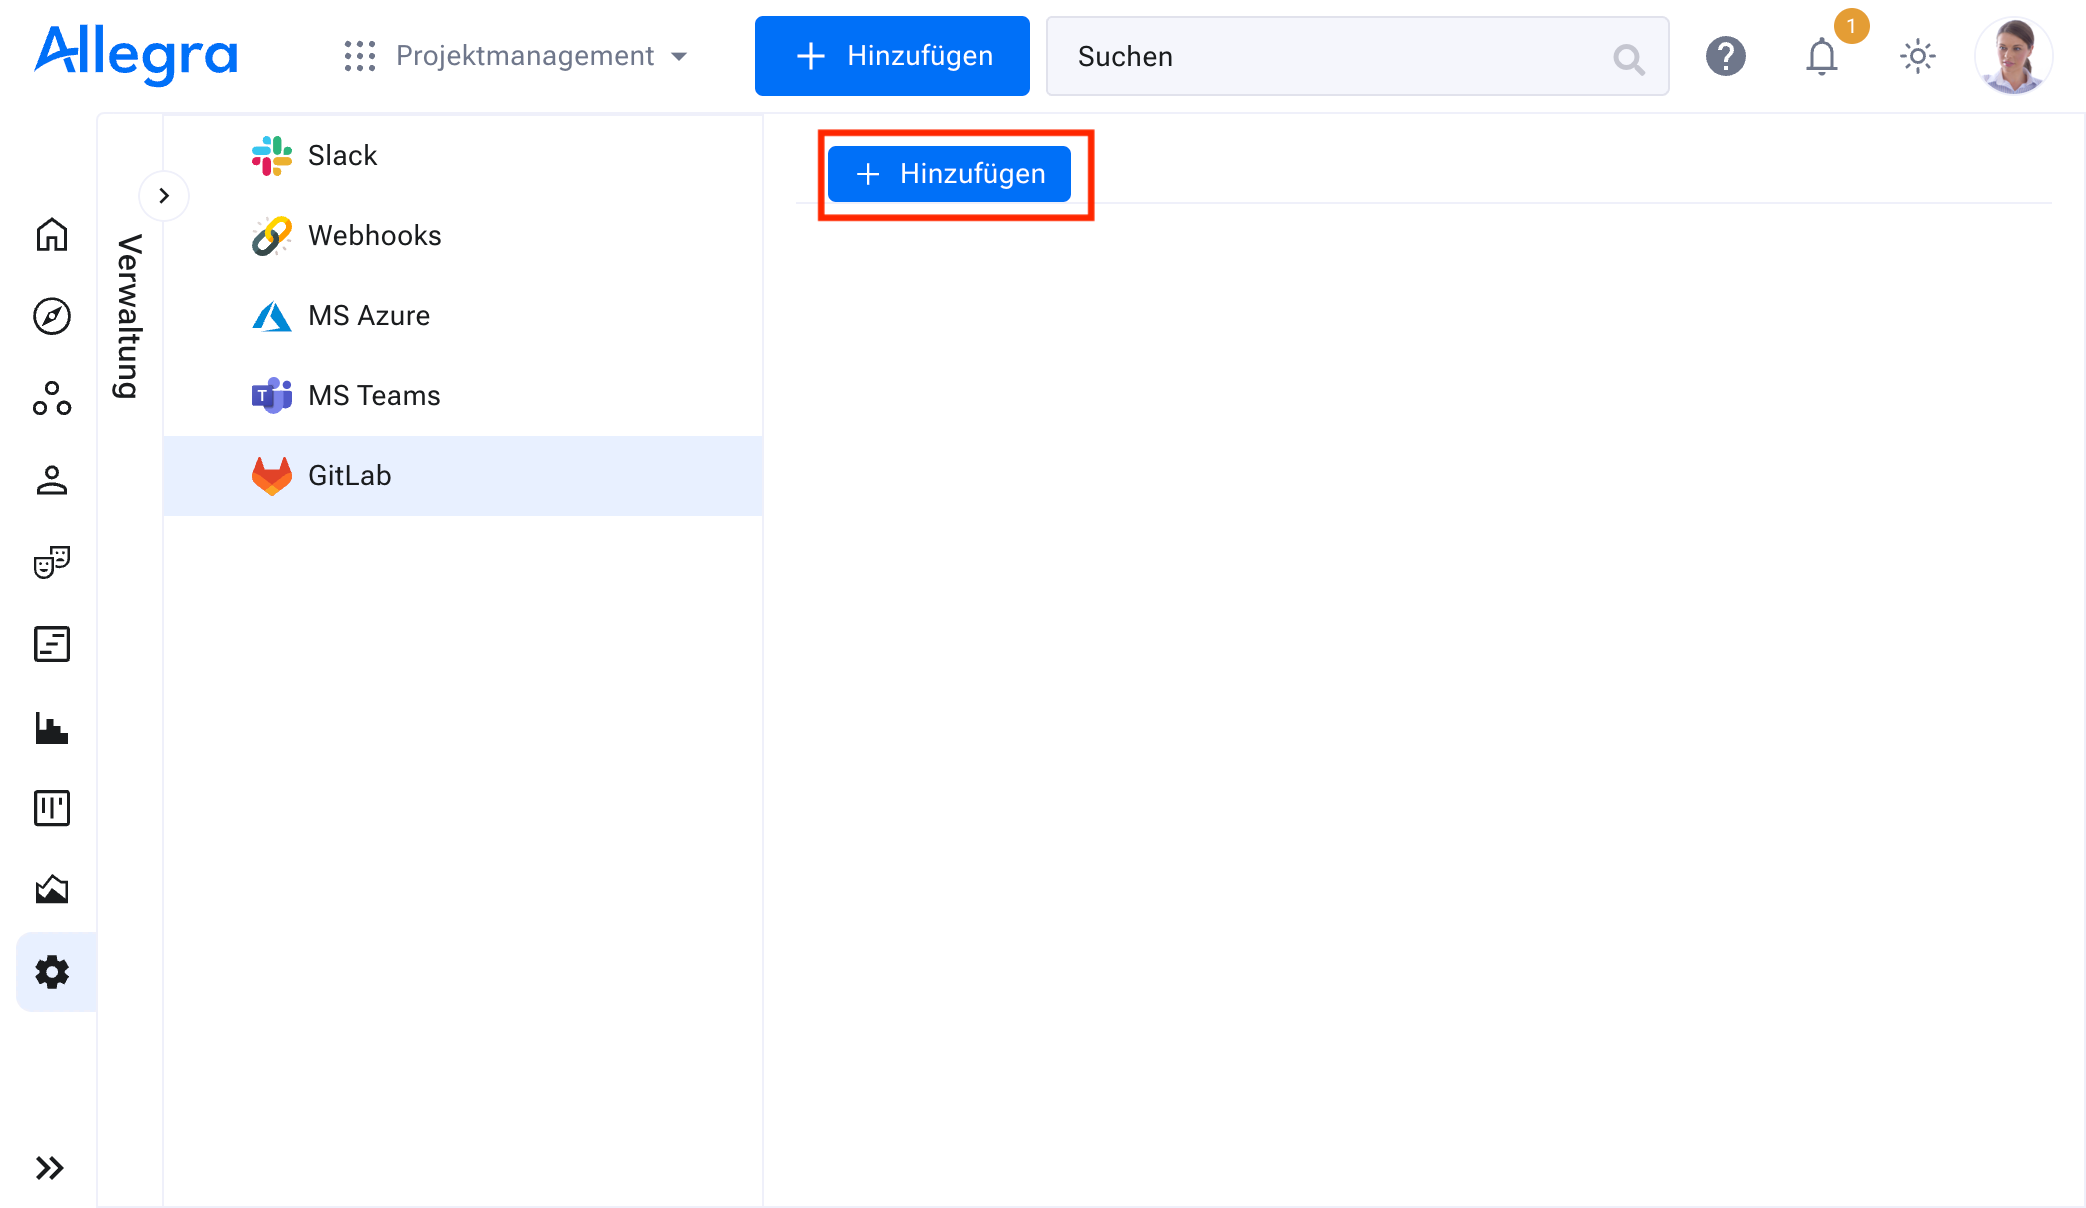
Step 1: Opening the Allegra GitLab configuration menu#
Go to Administration > Integrations > Gitlab.
Here you can set up the GitLab integration.
Step 2: Creating a new connection#
Create a new connection to a GitLab server by clicking
Add.
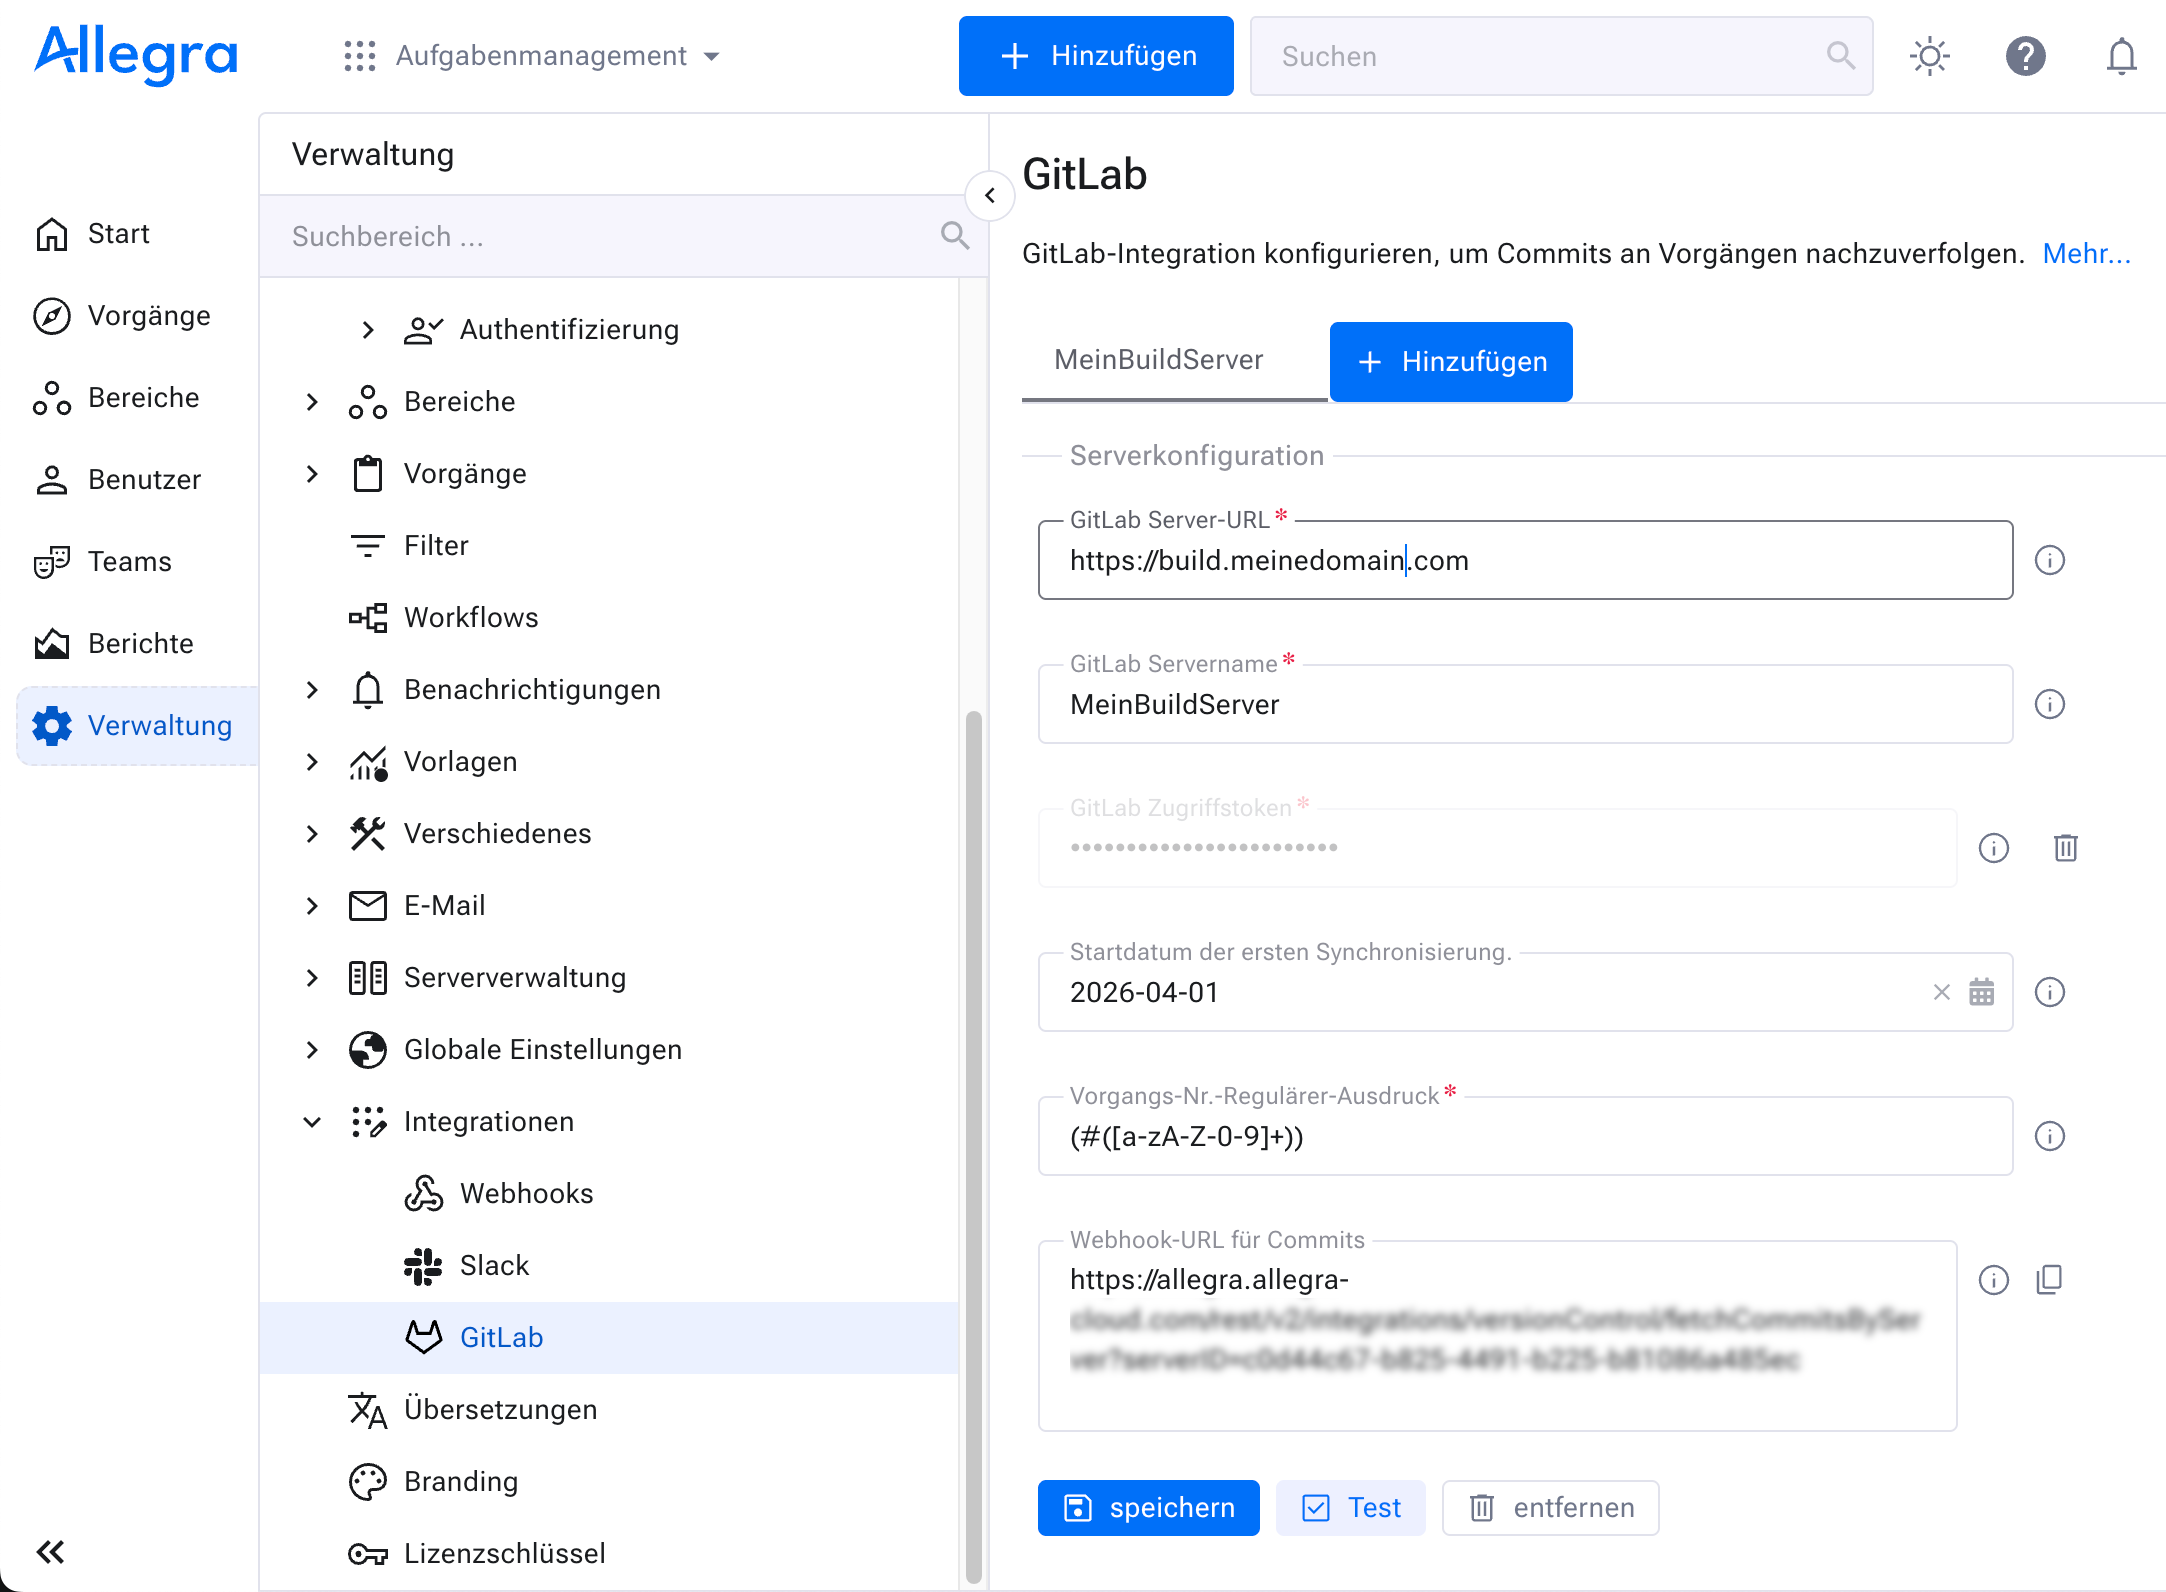
Step 3: Configuring the connection#
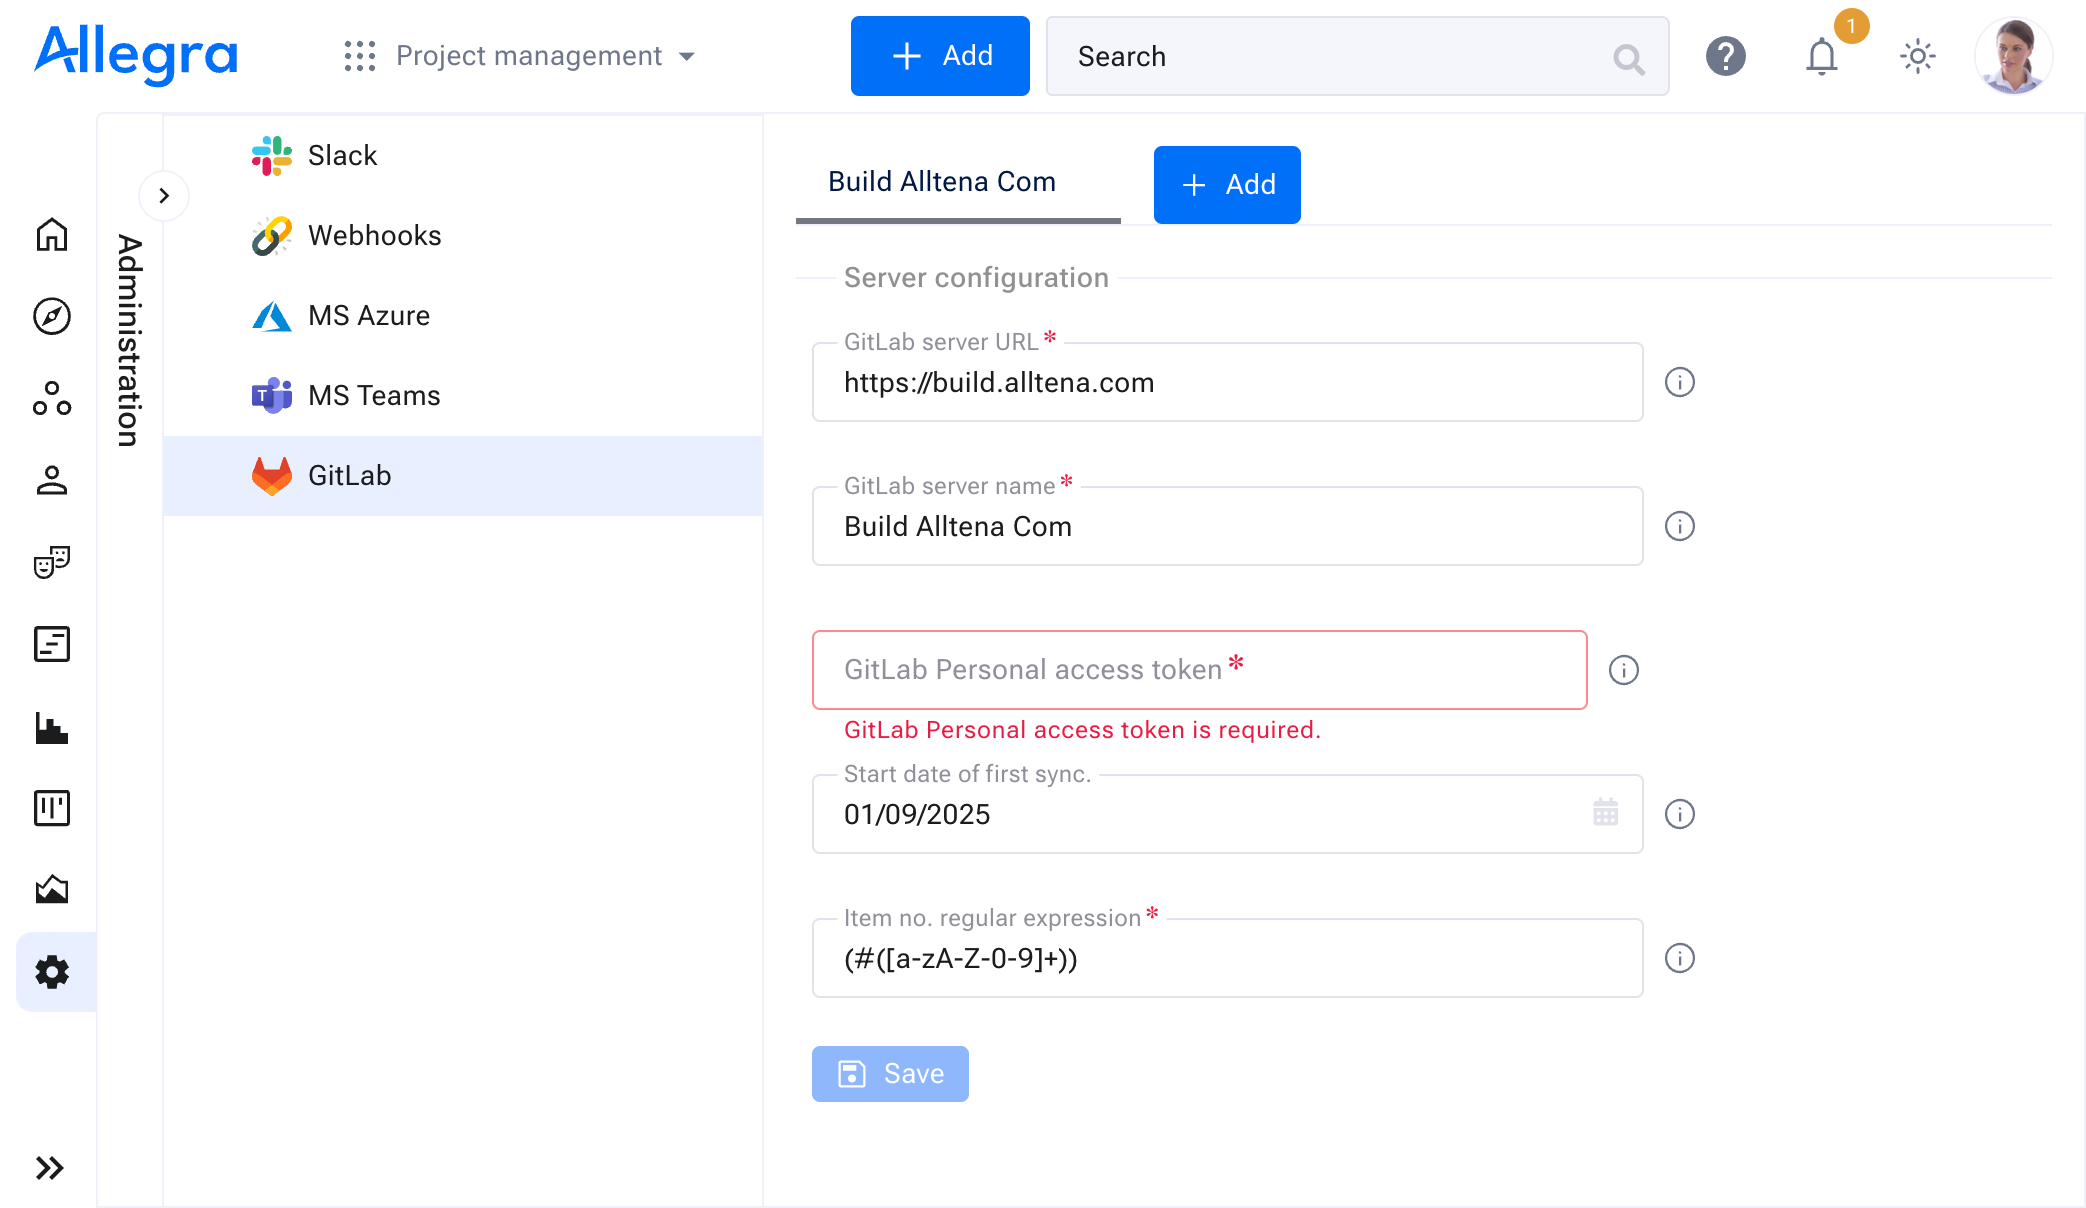
When configuring the connection, you can set the following parameters:
Parameter |
Description |
|---|---|
GitLab server URL |
The URL of your GitLab server. For example: https://build.alltena.com. Replace this with your GitLab server URL or static IP. |
GitLab server name |
An identifier for the connection. You can use the automatically generated name or adjust it if needed. |
GitLab access token |
A token generated in GitLab that determines which projects can be accessed. Replace this with your GitLab access token. For more information, see Retrieving the GitLab access token. |
Start date of the first synchronization |
The start date from which Allegra searches for commit messages containing Allegra item numbers. |
Regular expression for item numbers |
The regular expression Allegra uses to detect patterns in commit messages. By default:
Example of a commit message: “Implement new authentication logic to increase security #WORK-4711” |
After saving a configuration, you can validate the connection by clicking Test.
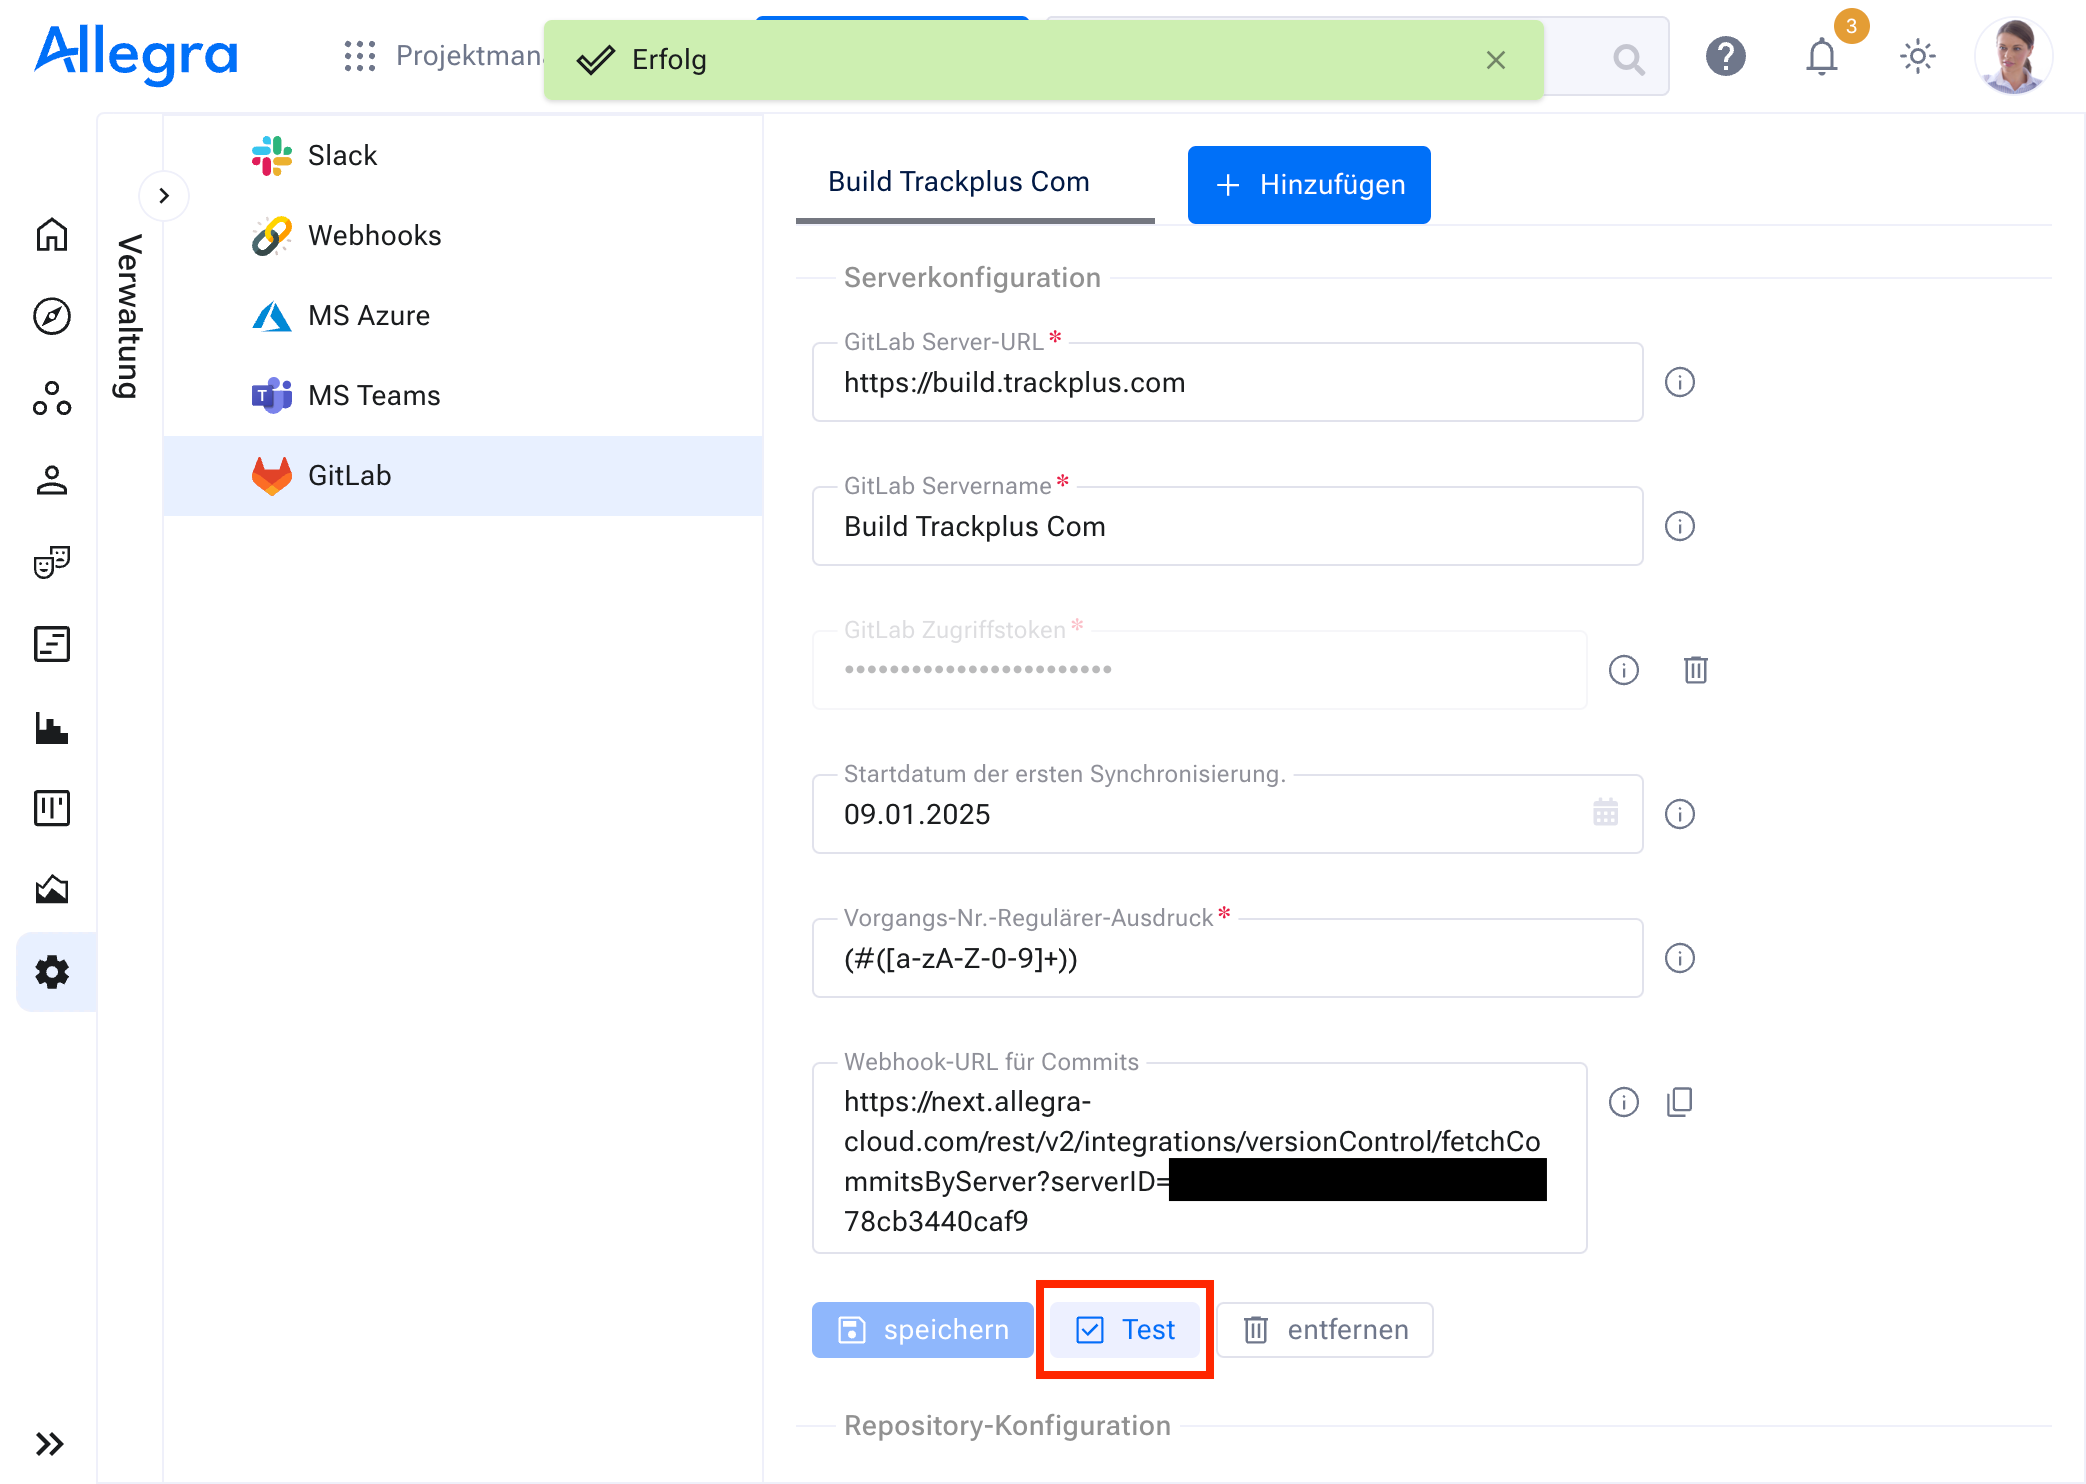
Once the server connection has been validated successfully, you can start the synchronization Step 4: Starting synchronization.
Step 4: Starting synchronization#
After validating the server connection, select the GitLab projects you want to synchronize and click Save.
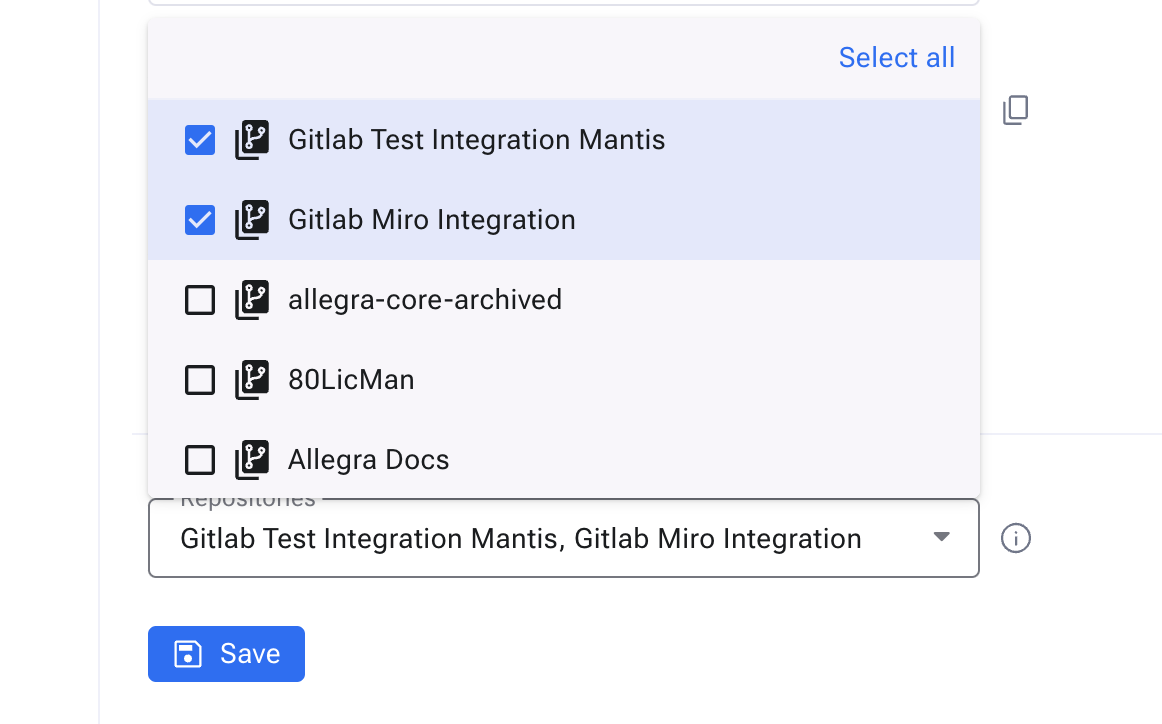
After saving the repository configuration, the initial synchronization starts automatically.
Hint
You can change the selection of synchronized repositories at any time. For example, when a new GitLab project has been added.
Hint
By default, changes from the GitLab server are synchronized every 10 minutes. However, by configuring a webhook, you can receive real-time updates. For more information on webhook setup, see Optional step: Webhook for direct synchronization
Retrieving the GitLab access token#
Allegra uses a token to communicate with your GitLab server. This token determines which GitLab projects Allegra can access. Only repositories accessible with this token are read and synchronized. Depending on the use case, you can use, for example, a Personal GitLab Token or a Project GitLab Token.
For more information on creating an access token, see the GitLab documentation (https://docs.gitlab.com/ee/user/profile/personal_access_tokens.html):

Attention
Please generate an access token with the following scopes: `read_api` and `read_repository`. For more details, see the GitLab documentation (https://docs.gitlab.com/ee/user/profile/personal_access_tokens.html).
Optional step: Webhook for direct synchronization#
By default, changes from the GitLab server are synchronized every 10 minutes. However, by configuring a webhook, you can receive real-time updates.
Allegra can synchronize version control data with a GitLab server in two ways:
- Through a scheduled automatic process every x minutes, where x can be adjusted in the
$ALLEGRA_HOME/quartz-jobs.xmlfile.
Through a GitLab webhook that calls the Allegra REST API to enable real-time updates.
Steps to set up the webhook connection:
Navigate to the Settings of your GitLab project and select Webhooks.
Copy the webhook URL generated in the Allegra GitLab integration menu, which was created automatically after a successful connection (Step 3: Configuring the connection).
Paste the URL into the corresponding field in GitLab.
Enable the following triggers: - Push Events - All Branches
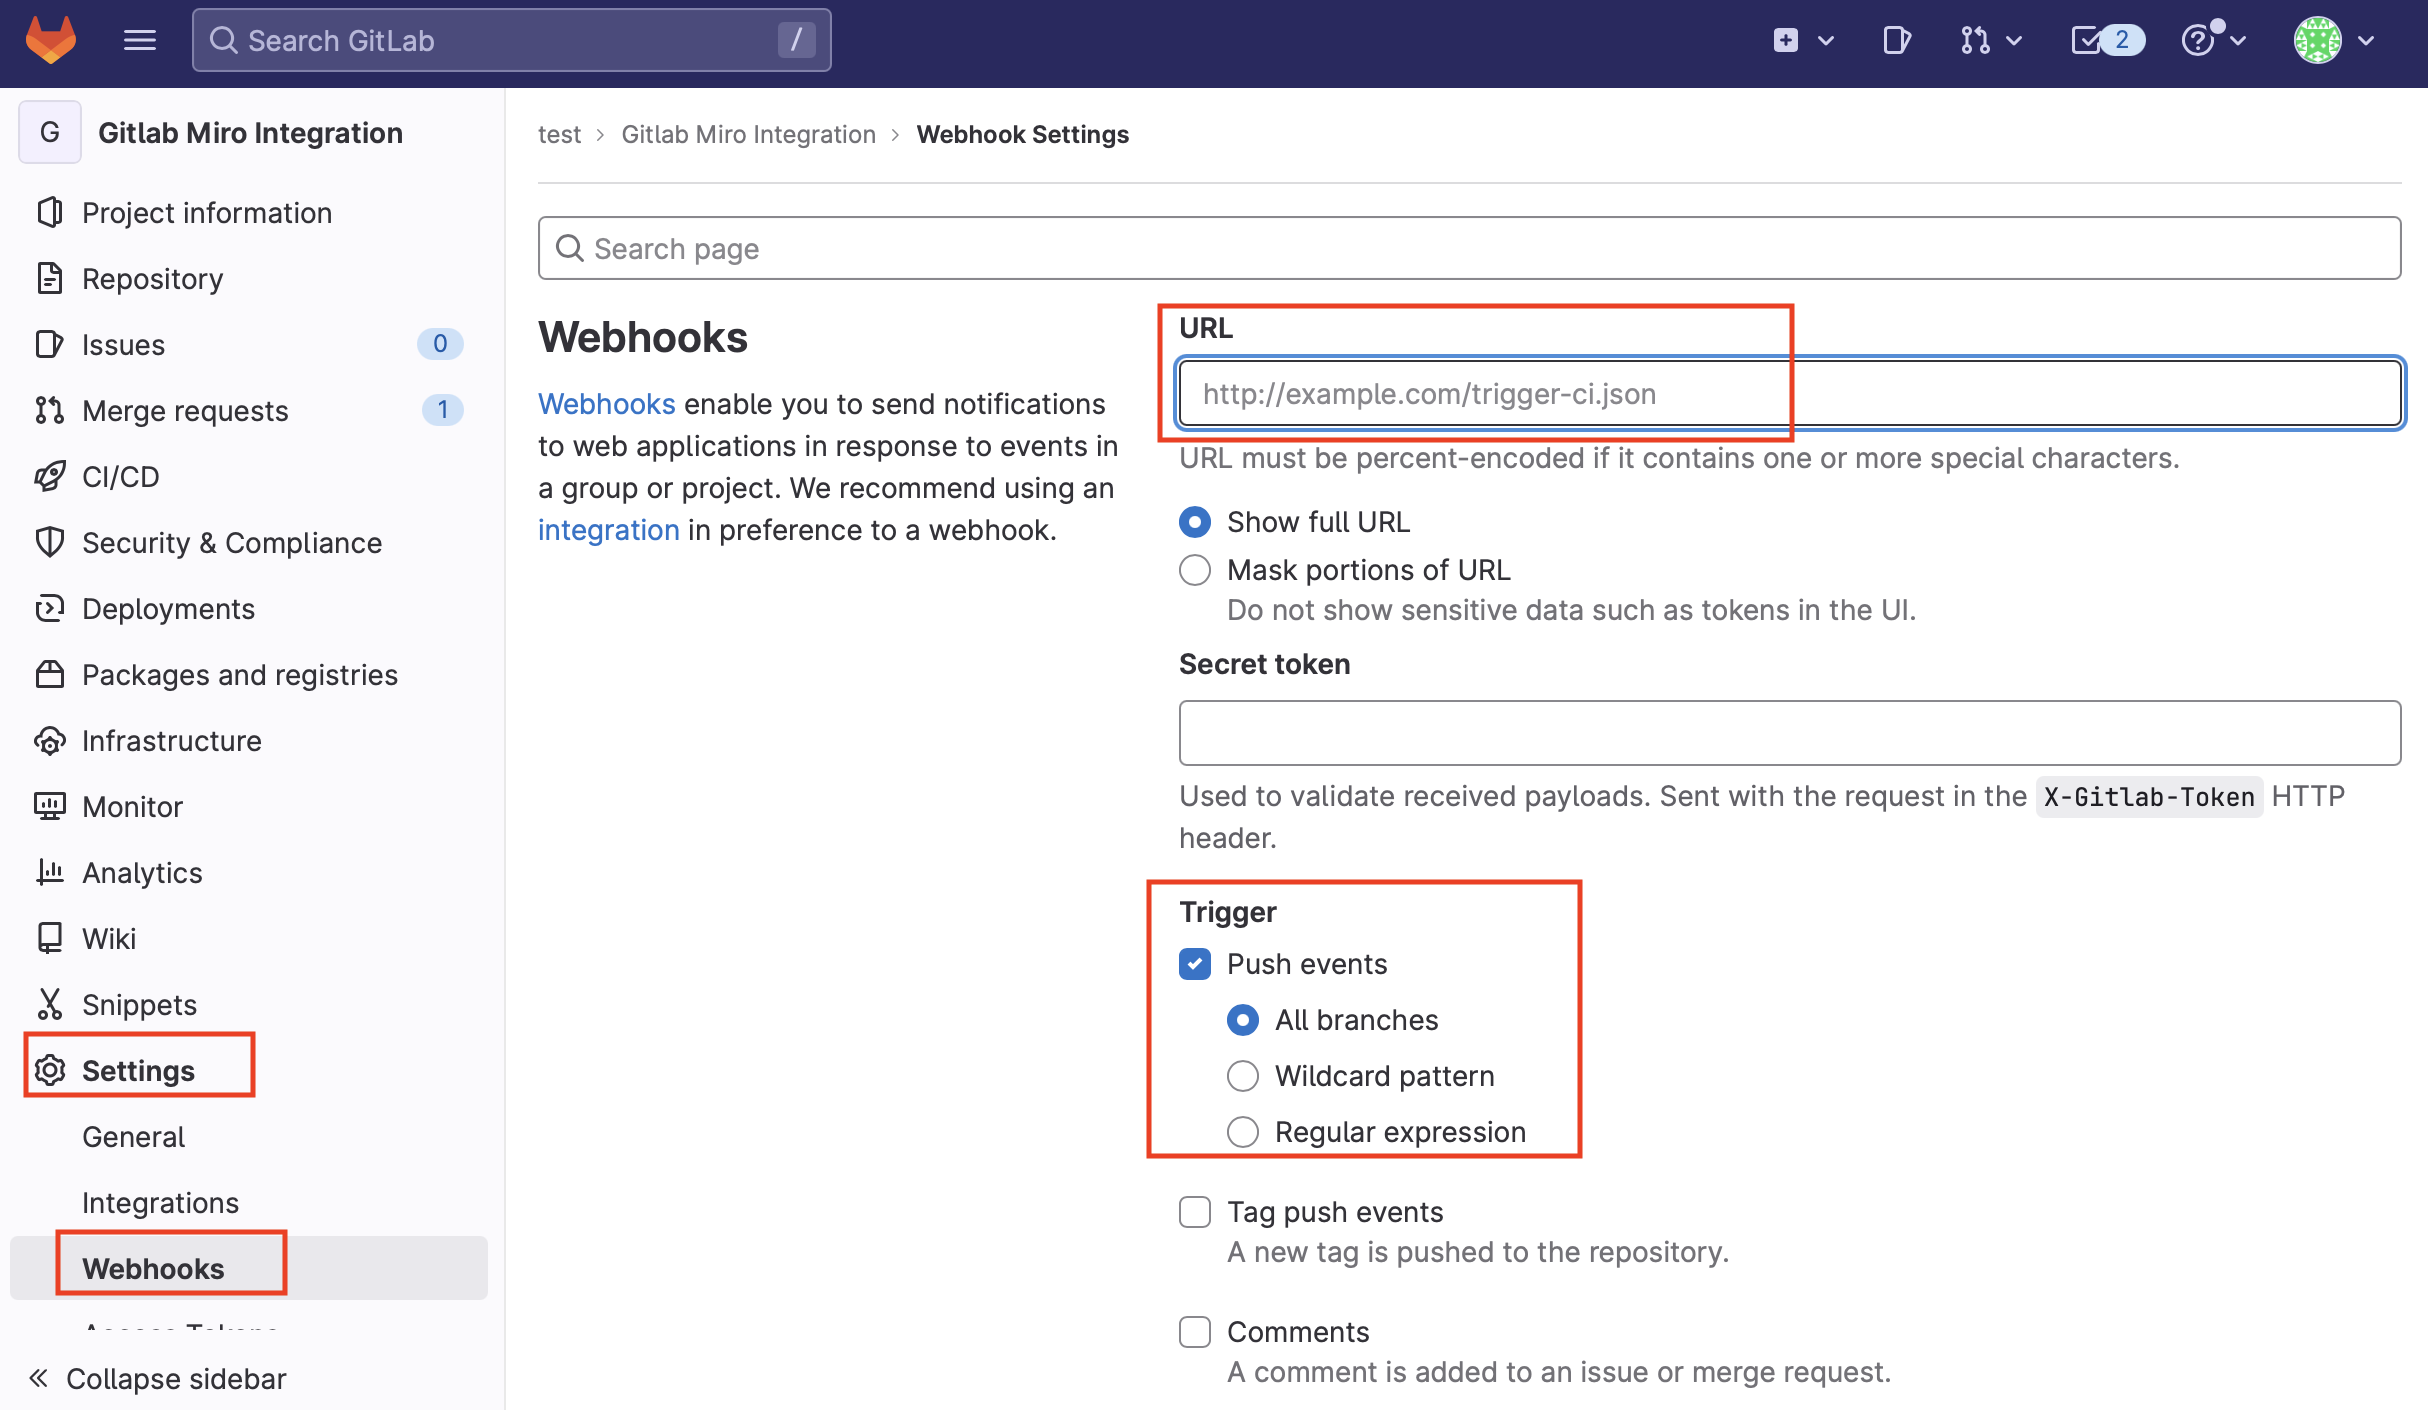
Attention
Make sure that you configure a separate webhook for each synchronized GitLab project.
Optional step: Adjusting the regular expression#
By default, Allegra searches your GitLab commit messages for strings that match the following pattern:
(#([a-zA-Z-0-9]+))
This regular expression detects strings such as #4711 or #WORK-4711 in commit messages.
If you want Allegra to detect a different format, you can change the regular expression accordingly. For example, to detect strings such as #AL:4711 or #AL:WORK-4711, you can use this pattern:
(#AL:([A-Z0-9-]+))
Using the GitLab integration#
The GitLab integration offers various ways to improve your workflow. All methods require a commit message with an Allegra item ID within a connected GitLab project.
Creating a commit in GitLab#
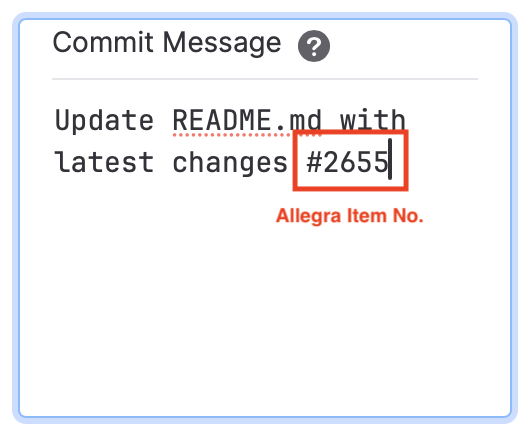
Hint
We recommend using the “Copy to clipboard” function in the input form of an item to copy the Allegra item number quickly and conveniently.
Version control in the item view#
In the lower area of the editing form of an item, the “Version control” tab displays all commits, branches, and pull requests (coming soon) that are assigned to this item. As described above, the link is made using the item numbers as part of the commit text or the name for branches and pull requests.

Commits, branches, and pull requests (coming soon) assigned to the item#
Version control cockpit tile#
The version control cockpit widget can display all version control activities in an Allegra project, regardless of the underlying version control system. When you click the associated link, you are taken to the internal or external version control browser, depending on the configuration.
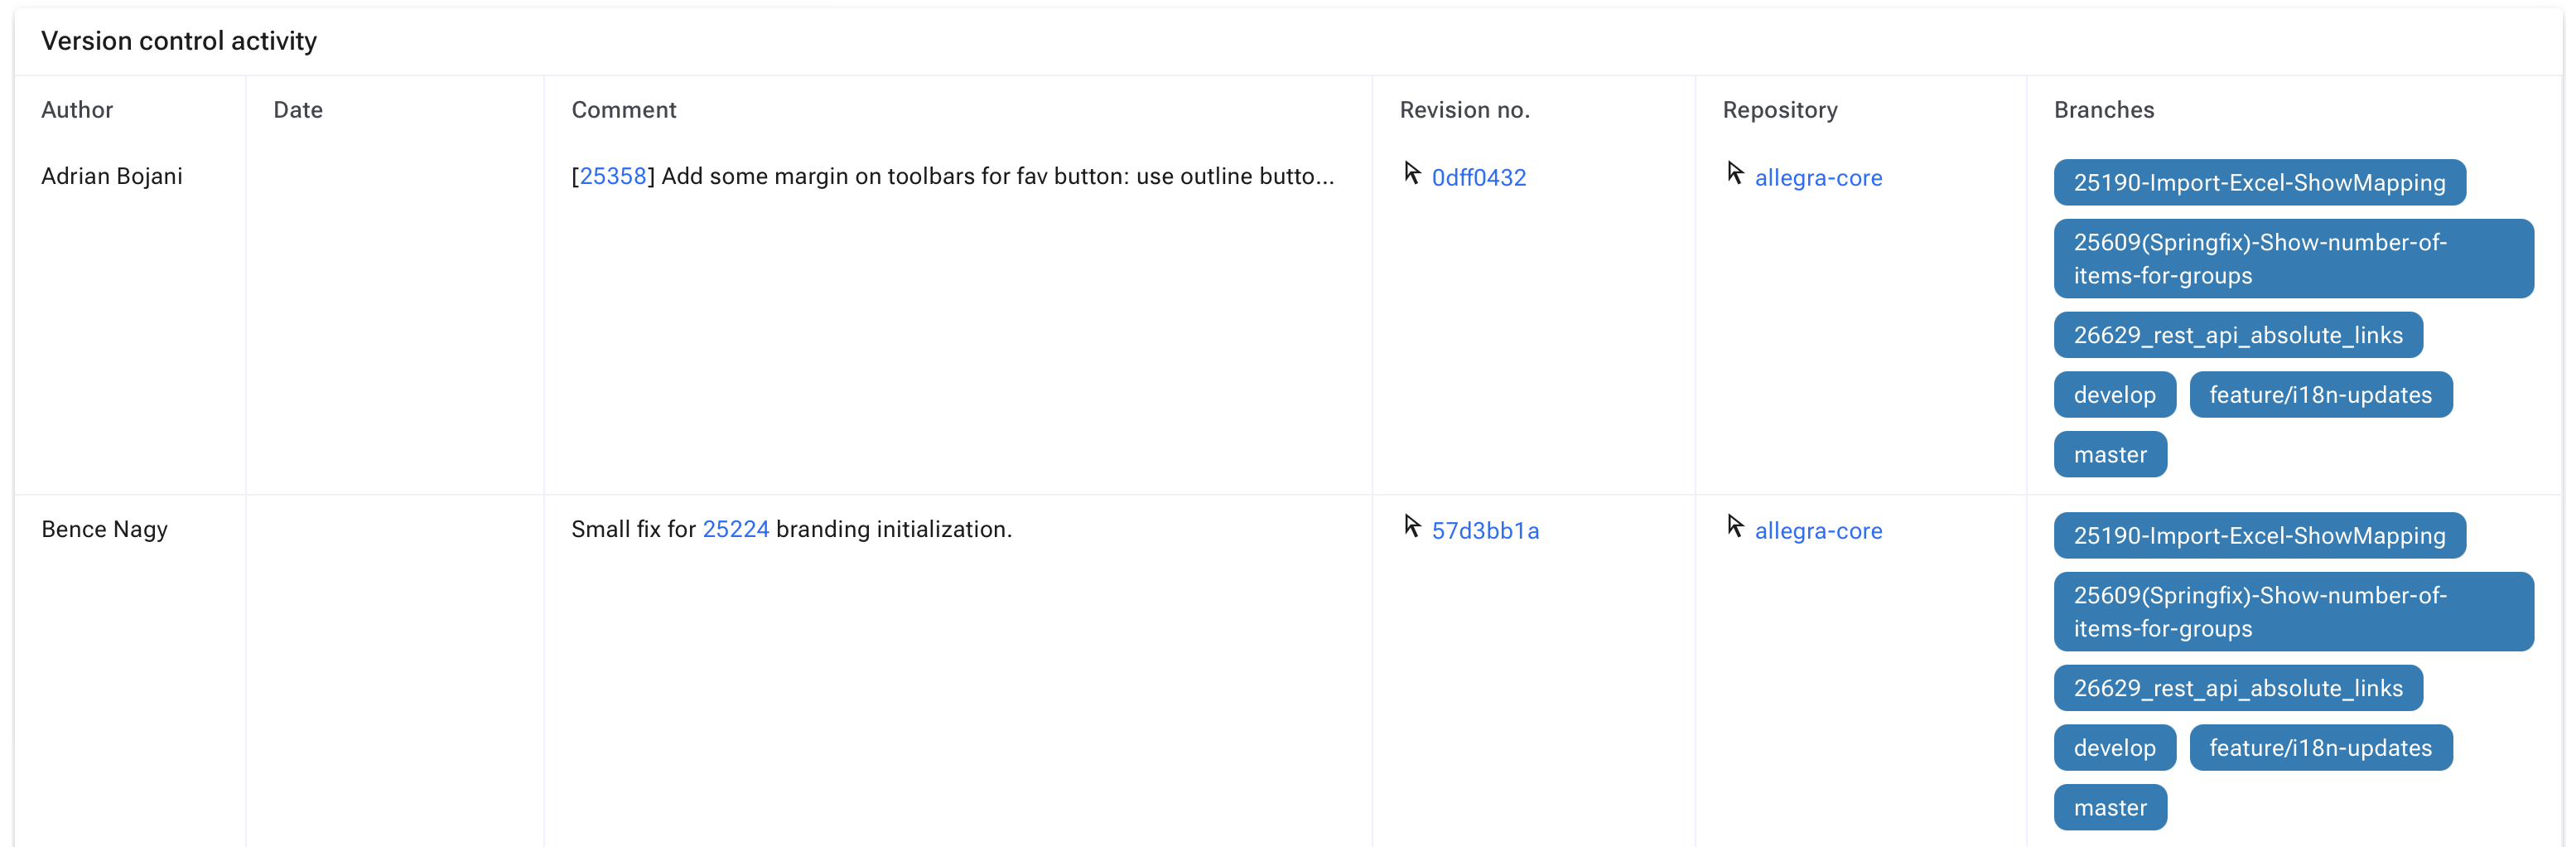
Cockpit tile for displaying version control#
Version control notifications#
The version control notifications can be controlled by adjusting the notification settings.

Example of a version control notification#
Git snippets#
Git snippets are predefined code snippets that make it easier for you, for example, to quickly create a branch or commit based on an item.

Four predefined snippets are available.#
If you are logged in as a system administrator, you can customize the snippets at the following path:
Administration > Server configuration > Miscellaneous > Advanced settings
There you can edit existing snippets, add new ones, or remove ones you do not need.
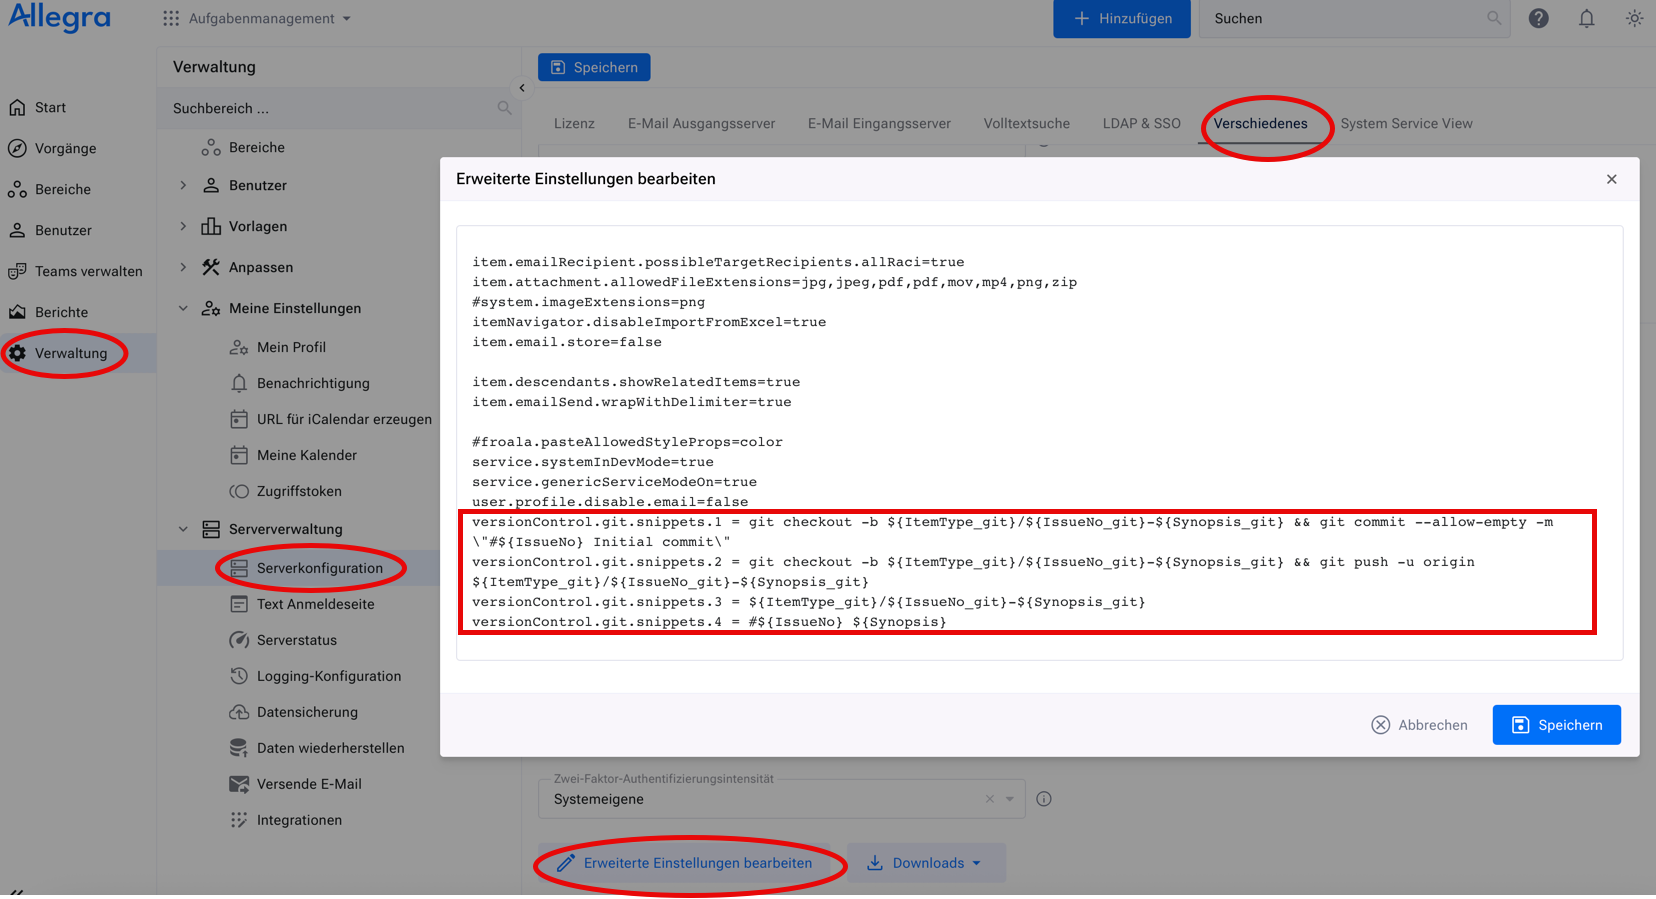
Adding a new snippet#
To create another snippet, follow the existing structure and increase the index by 1. Example:
versionControl.git.snippets.5 = #${IssueNo} ${Synopsis}
Available variables#
The following placeholders can be used in the snippets:
${ItemType_git}: item type (lowercase, no spaces)
${IssueNo_git}: item number (lowercase, no spaces)
${Synopsis_git}: item title (lowercase, no spaces)
${ItemType}: item type (formatted)
${IssueNo}: item number (formatted)
${Synopsis}: item title (formatted)
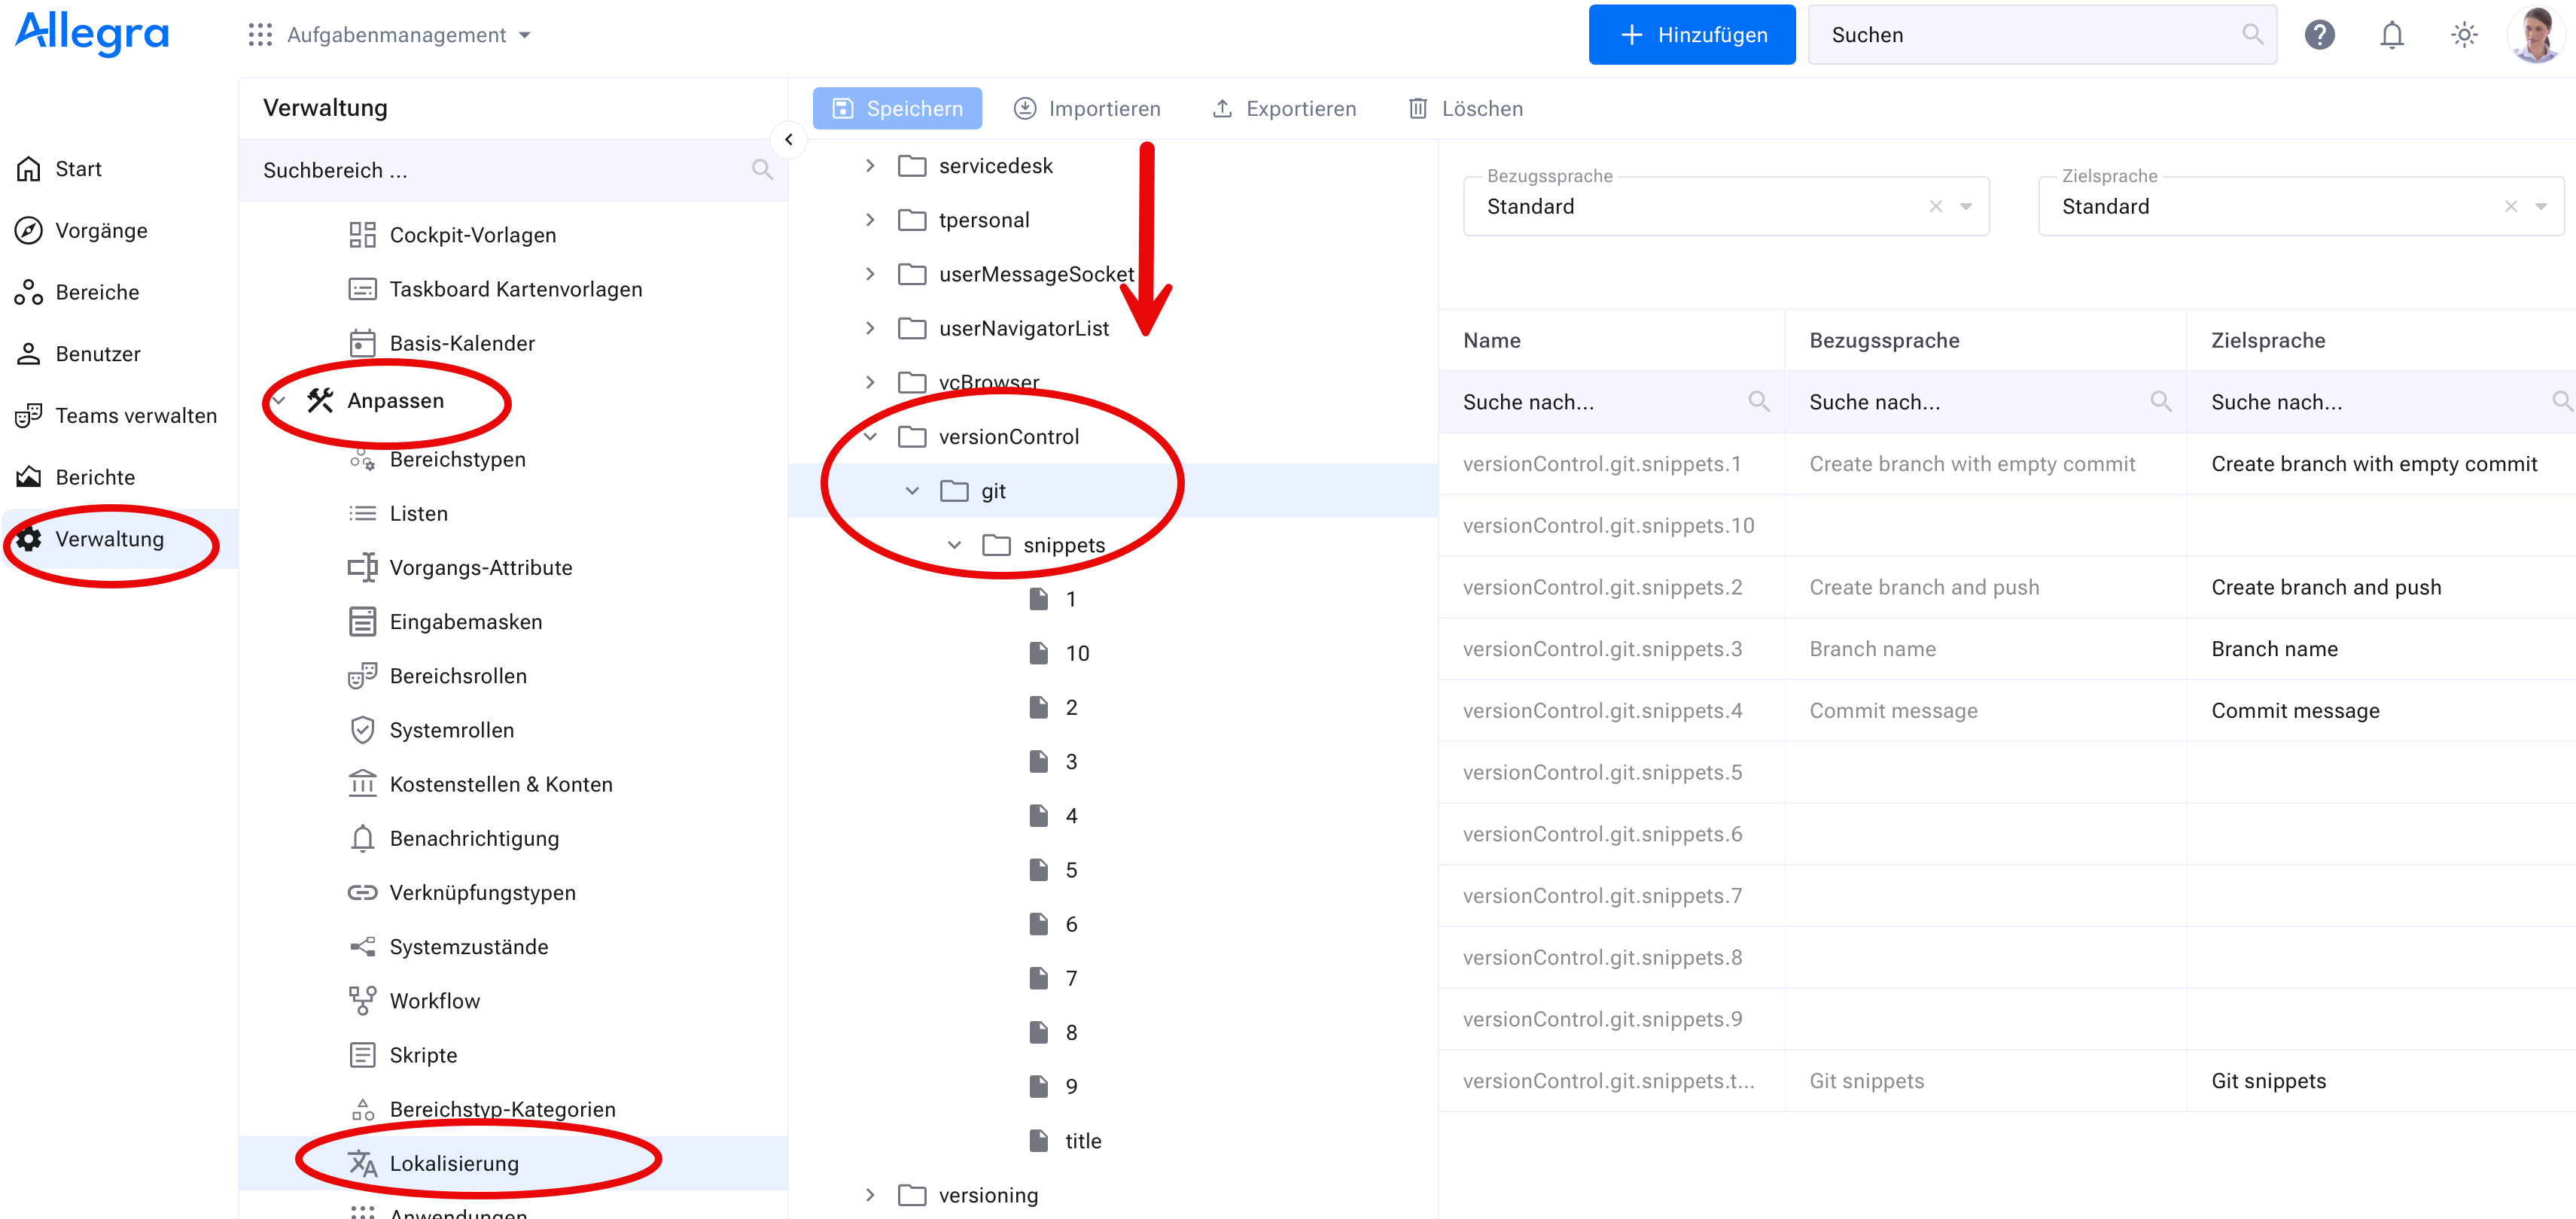
Customizing snippet labels#
The labels of the snippets can be changed through localization. To do this, navigate to:
Administration > Customize > Localization > Allegra UI labels > versionControl > git > snippets