

Workflows#
sysman sysadmin
Workflows in Allegra are based on the states of items. A workflow is a number of states linked by transitions.
You can define workflows with the workflow editor, in which you specify
What triggers a state transition
Which conditions must be met for the state transition to actually occur
Everything that should happen during the transition from the source state to the target state
To add or edit workflows, go to Administration >
Workflows.
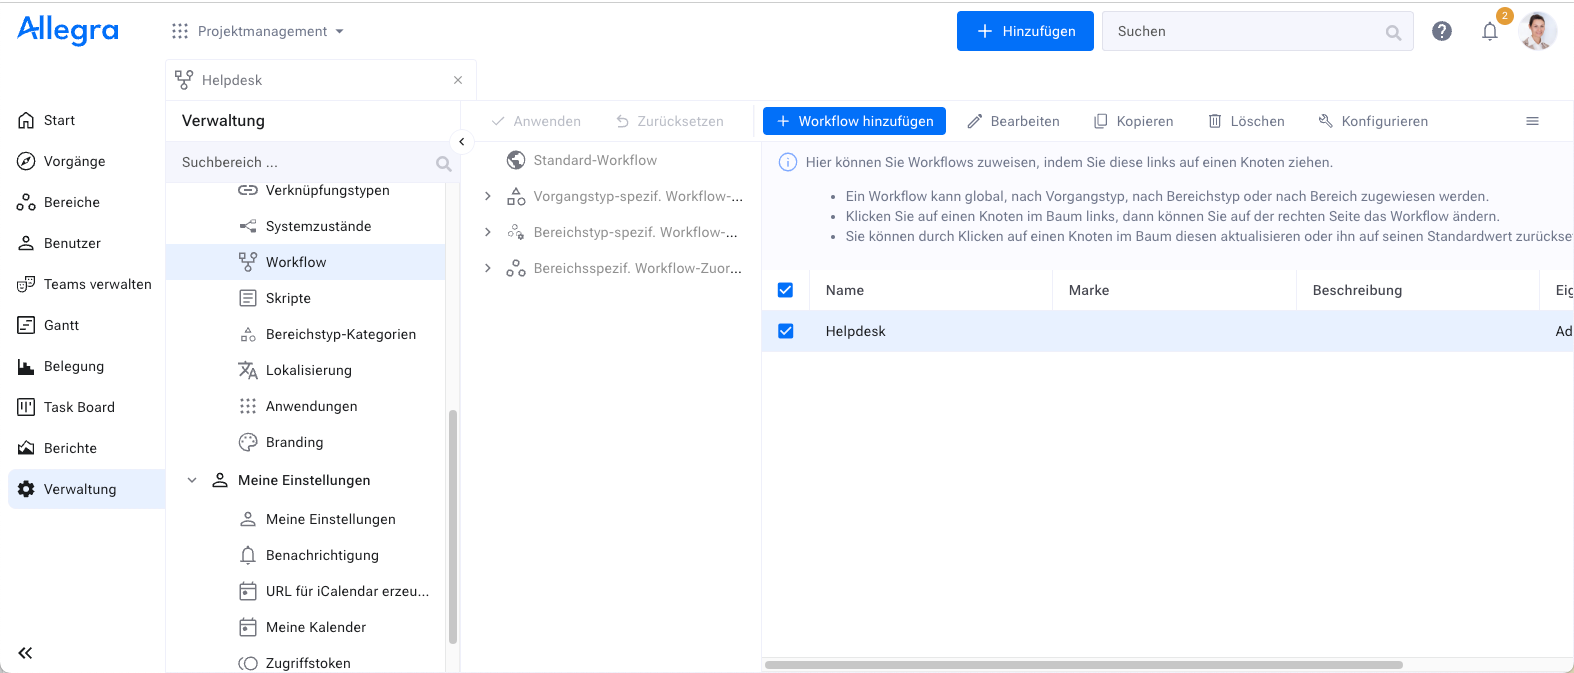
Adding and editing workflows#
In the third column from the left you see the default hierarchical configuration scheme. You assign workflows to item types, workspace types and workspaces by dragging them from the table on the right onto the corresponding node in the third column. Workflows are inherited from global assignments down to the most detailed assignment for a specific item type in a specific workspace.
You can override a workflow at a lower level by assigning a different workflow there. You can return to the inherited assignment by resetting that node.
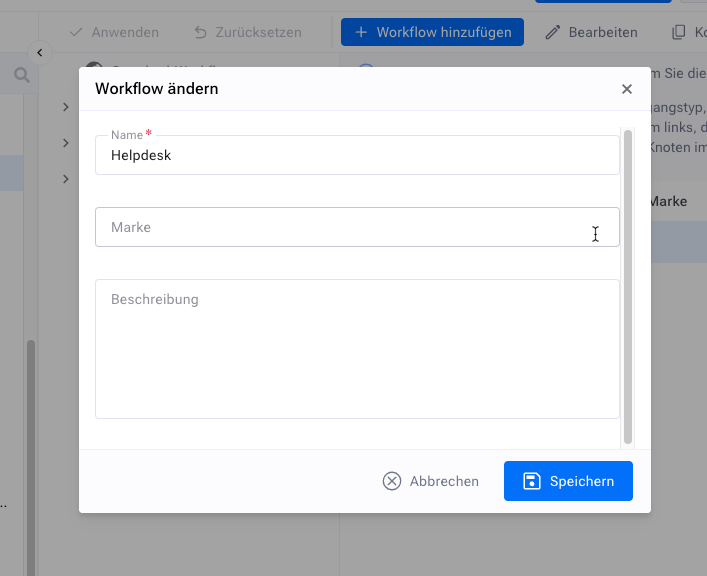
To add a workflow, click “Add” in the toolbar. Enter a name, an optional tag if you have many workflows and want to group and categorize them, as well as an optional description. Then save the workflow.
To define the workflow, select an existing one and click “Configure” in the action menu. To define a new workflow, click “Add”. A graphical editor window opens.
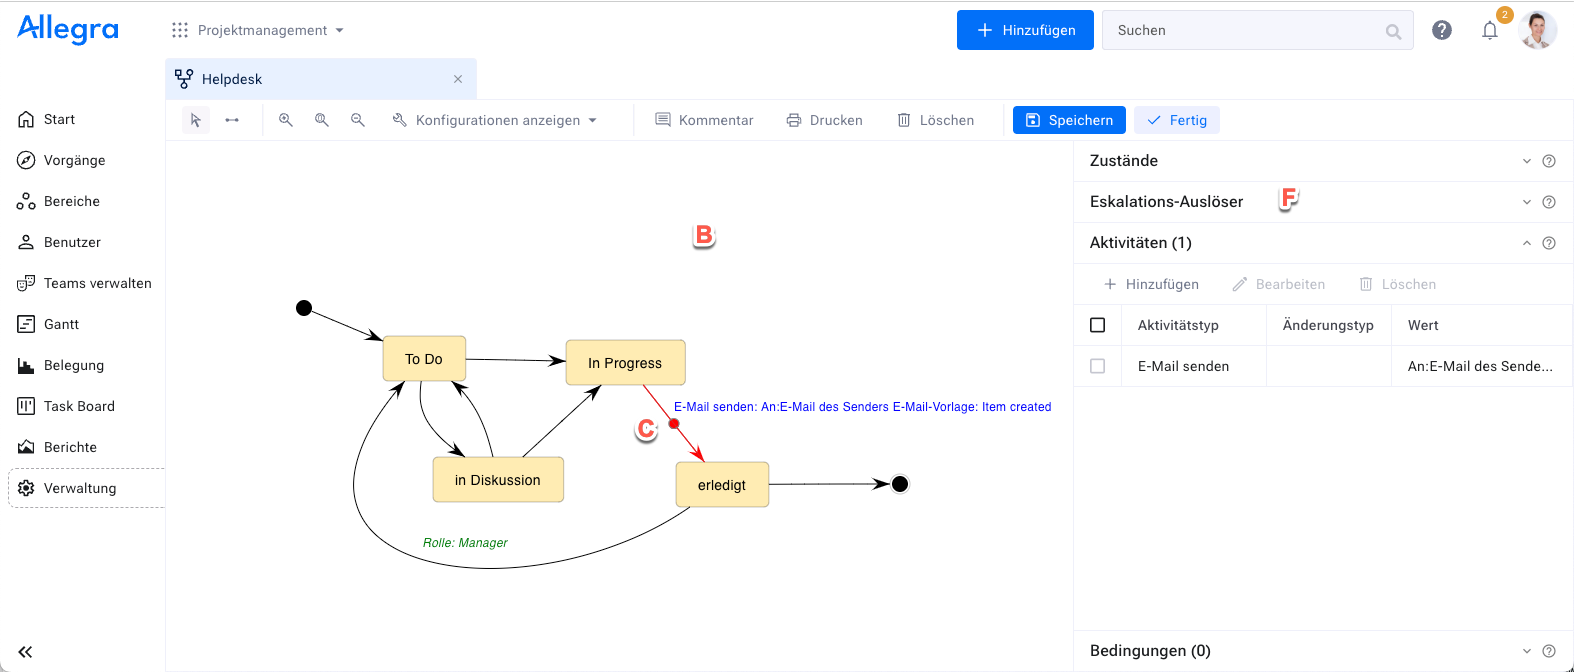
The graphical workflow editor#
To begin, you will drag a number of states from area A to area B. There is a special start state that lies outside the regular set of states. The transition from this start state to another state in your workflow diagram occurs when an item is created. This is useful when you want to initially assign this item to someone based on item data such as keywords or tags. This also works when items are created by sending an email.
You can connect states with transitions. To draw a transition, select the transition symbol in the small toolbar, click the source node and drag the line to the target node. You can change the shape of the transition by moving its handles (shown as C in the figure above).
You can associate a transition with four properties:
Events that trigger this transition
Conditions (“guards”) that can prevent the transition
Activities that are performed during the transition
The following section describes these elements in more detail.
Triggering event#
A transition is triggered or initiated by an event. The events currently to be processed are held in a queue.
The workflow engine runs in a cycle of 60 seconds, i.e. every 60 seconds the trigger event queue is checked. As long as there are still entries, they are processed. Processing a trigger may lead to new triggering events, which are immediately appended to the queue.
The following events are predefined in Allegra:
Saving a changed item, manually or by the workflow engine
A timeout based on the last change of an item
A timeout based on the last state change of an item
A state-change action requires that the source and target states are different. In all other cases the source and target states can be the same. For example, you could perform checks on an item when it is edited. Or you could automatically change an item attribute when the responsible was changed. Or you could automatically change the responsible assignment for a child item. In principle there are no limits to what you can do when an item is changed.
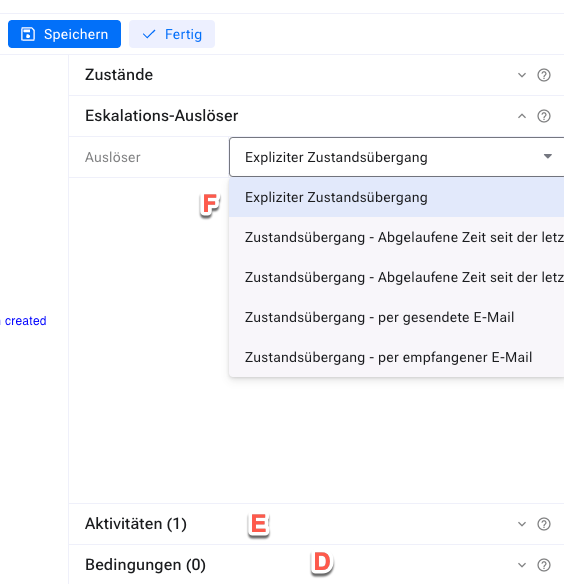
You associate a triggering action “Trigger” or “Escalation trigger” with a transition by first selecting the transition (C) and then the escalation trigger (F).
Conditions (“guards”)#
Once a transition is triggered, an optional guard condition must be met for the transition to actually take place. If the guard condition is false, the transition is rejected. You associate a guard condition with a transition by first selecting the transition (C) and then adding the desired guard conditions (D).
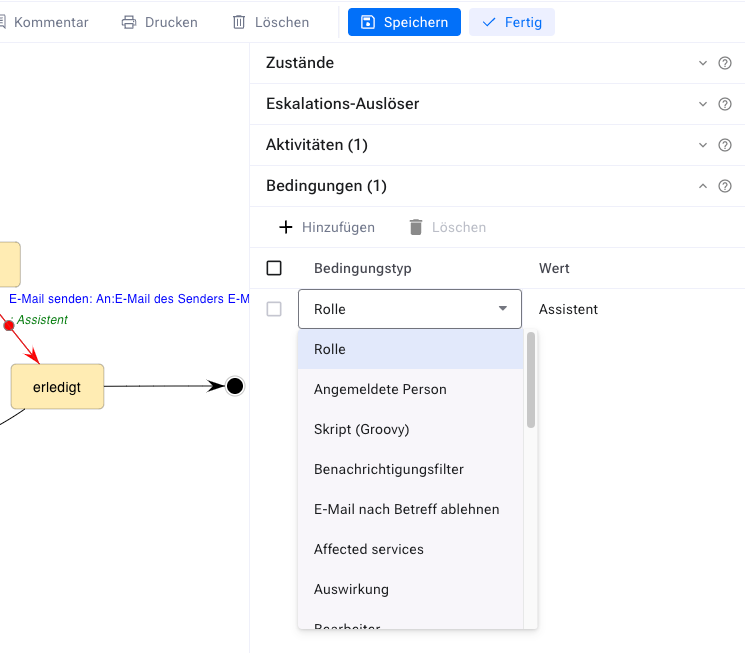
Guard conditions#
There are a number of guard conditions:
A role that the person who initiates this transition via an action must have in the workspace to which the item belongs
A specific person
A guard script for the workflow
An automail condition (see automail conditions)
If you specify a number of guards, the transition is performed when one of the guards is satisfied.
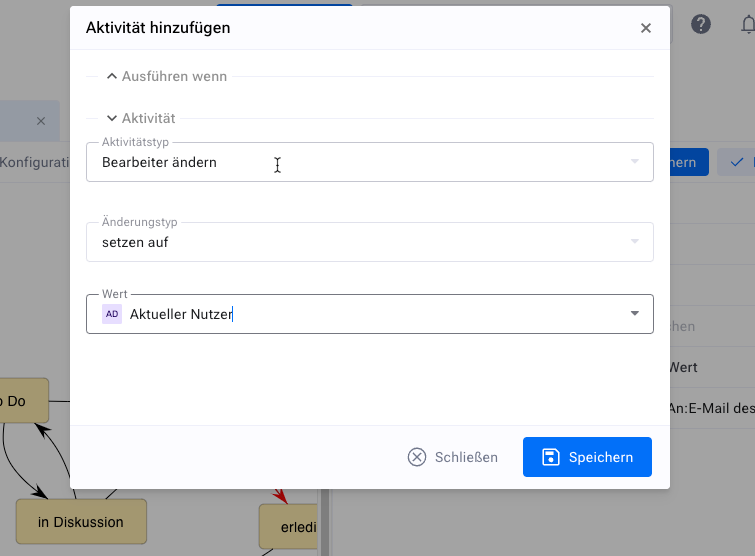
Activities#
When a transition is taken, the activities associated with it are executed. You associate transition activities with a transition by first selecting the transition (C) and then adding the desired activities (E).
There are a number of transition activities:
Changing any item property such as responsible, manager or status
Sending an email based on an email template
Running a workflow activity script
With a script for a workflow activity you can basically do anything you can imagine: create child items, copy project templates, and so on.
Activities#
When you select a change activity for an item attribute, instead of a concrete value you can enter a parameter into the workflow. When you assign such a workflow to a workspace, an item type or a workspace type, you can then interactively assign a real value.
All activities except sending emails initially change only a copy of the affected item. Only when the last activity ends are the changes saved. Emails are always based on the saved item data and are therefore sent only after the last activity.
States#
A workflow is described mainly by states and transitions between the states. In addition to the states you have defined in your system, there are two further states available in the workflow editor.
The start state is the one an item is in after it has been created and before it has been saved. If, for example, you allow items to be created by email, you can add conditions and activities to this transition that assign the item to a specific workspace or responsible based on the sender’s email address.
The transition to the end state occurs when an item is deleted. This is currently not possible, and in that respect this transition is meaningless at the moment.
Transitions to and from isolated nodes#
There are use cases where transitions between all workflow statuses should be possible, but drawing transitions from all statuses to all statuses forth and back would clutter the UI. To avoid this, new configurations were added which allows transitions to and from fully or partially isolated nodes. Workflows with isolated nodes are still more powerful than no workflow at all (i.e. relying only on allowed statuses assigned to workspace type-item type): the Entry/Exit/Do activities are still executed. Of course without explicit transition between two isolated nodes no transition activities can be configured.
There are four new configuration possibilities which controls the handling of fully and partially isolated nodes:
# Whether to allow a transition into a node without incoming transitions
workflow.allowTransitionToNodeWithoutIncomingTransition=<trueOrFalse>

# Whether to allow a transition into a node without any
# transitions (neither incoming nor outgoing transitions)
workflow.allowTransitionToIsolatedNode=<trueOrFalse>

# Whether to allow a transition from a node without outgoing transitions
workflow.allowTransitionFromNodeWithoutOutgoingTransition=<trueOrFalse>

# Whether to allow a transition from a node without any
# transitions (neither incoming nor outgoing transitions)
workflow.allowTransitionFromIsolatedNode=<trueOrFalse>

These settings are now system wide, later on these settings should
be configurable for each workflow.

The escalation trigger is taken into account by considering
whether a node is isolated or not. So for example if a node has
a transition triggered by receiving an E-Mail but has no transition
for explicit status transition than it still is considered isolated
with regard to explicitly selecting a new status through the
user interface.
Deleting & archiving items#
The workflow can control whether is possible to allow/prohibit deleting/archiving/undeleting/unarchiving of an item. The END station means either archived or deleted.
At workflow level there is no difference between archived and deleted: either both or none of them is possible. The user can decide on the UI whether the item will be deleted or archived, both refer to entering into the station called END.
The transitions to and from the END station can be conditioned either by explicit transitions with or without guards, or by the configurations regarding transitions to and from isolated nodes pertain also to entering leaving the END station.
Conditional activities#
Each workflow activity, be it a transition activity or a node activity (entry/exit/do), can have optionally a condition. This means the activity will be executed if either or no condition is defined or the condition is true.